recipe

Baked Panettone French Toast

Panettone

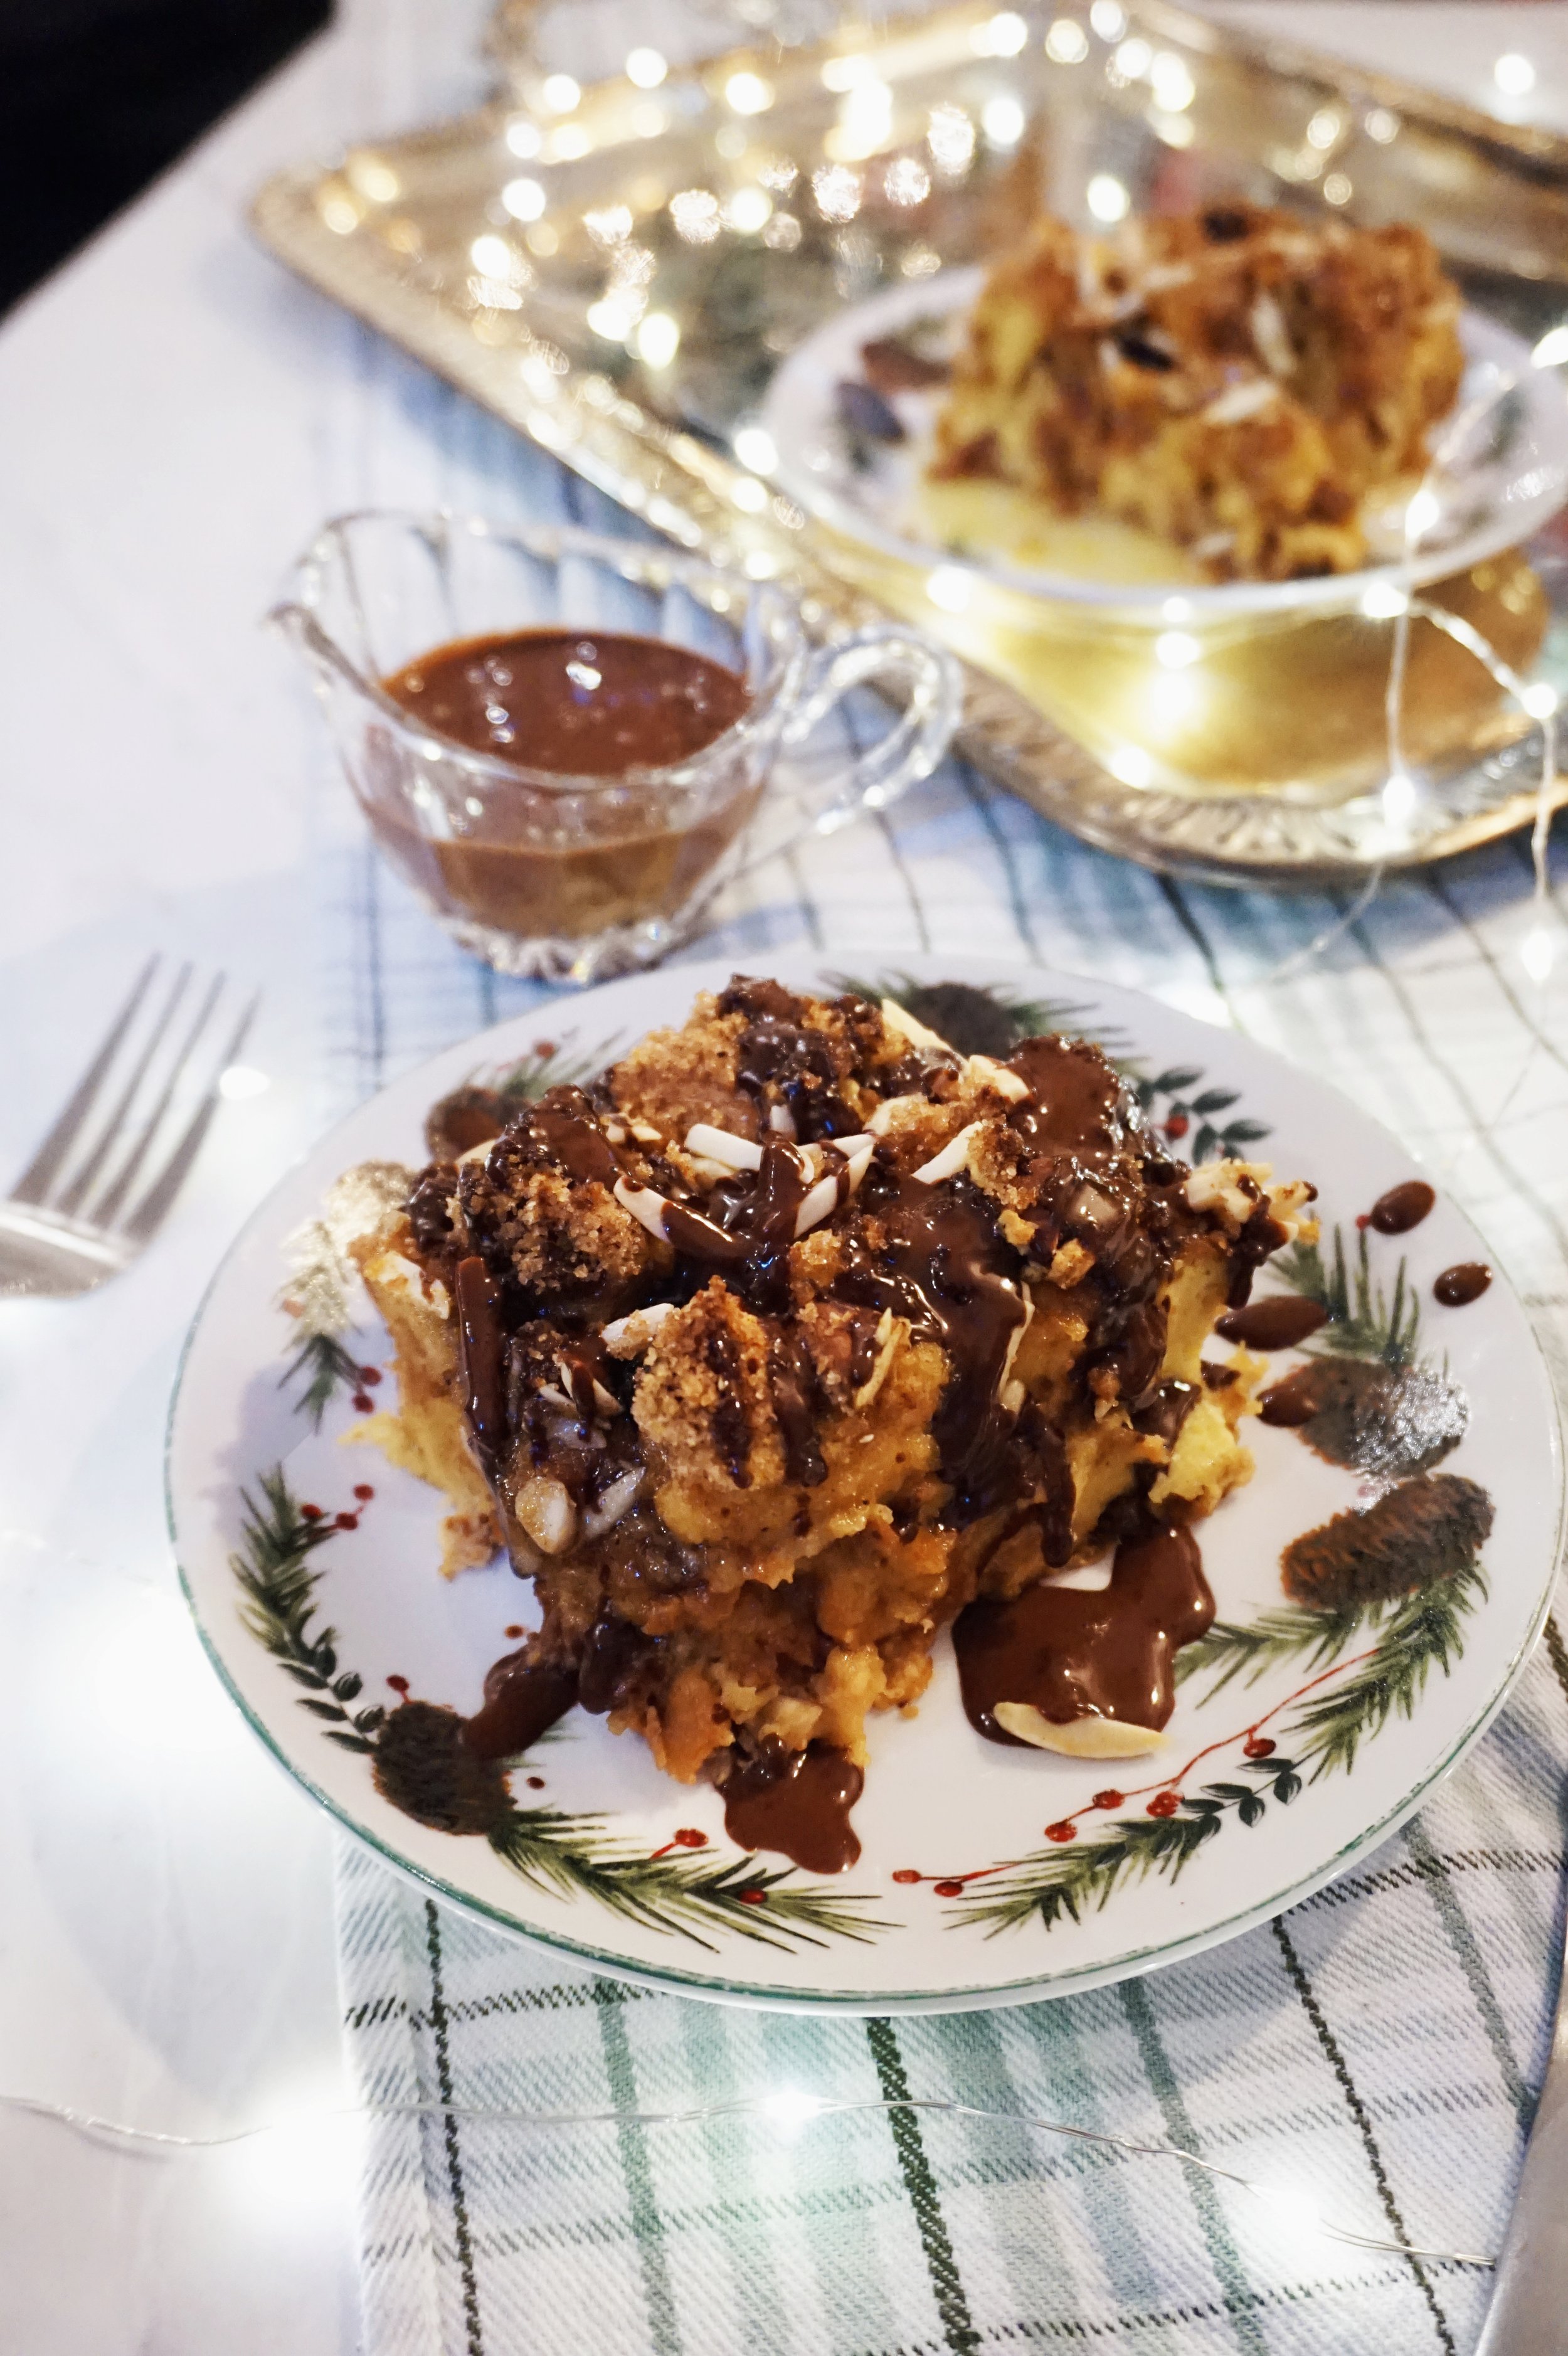
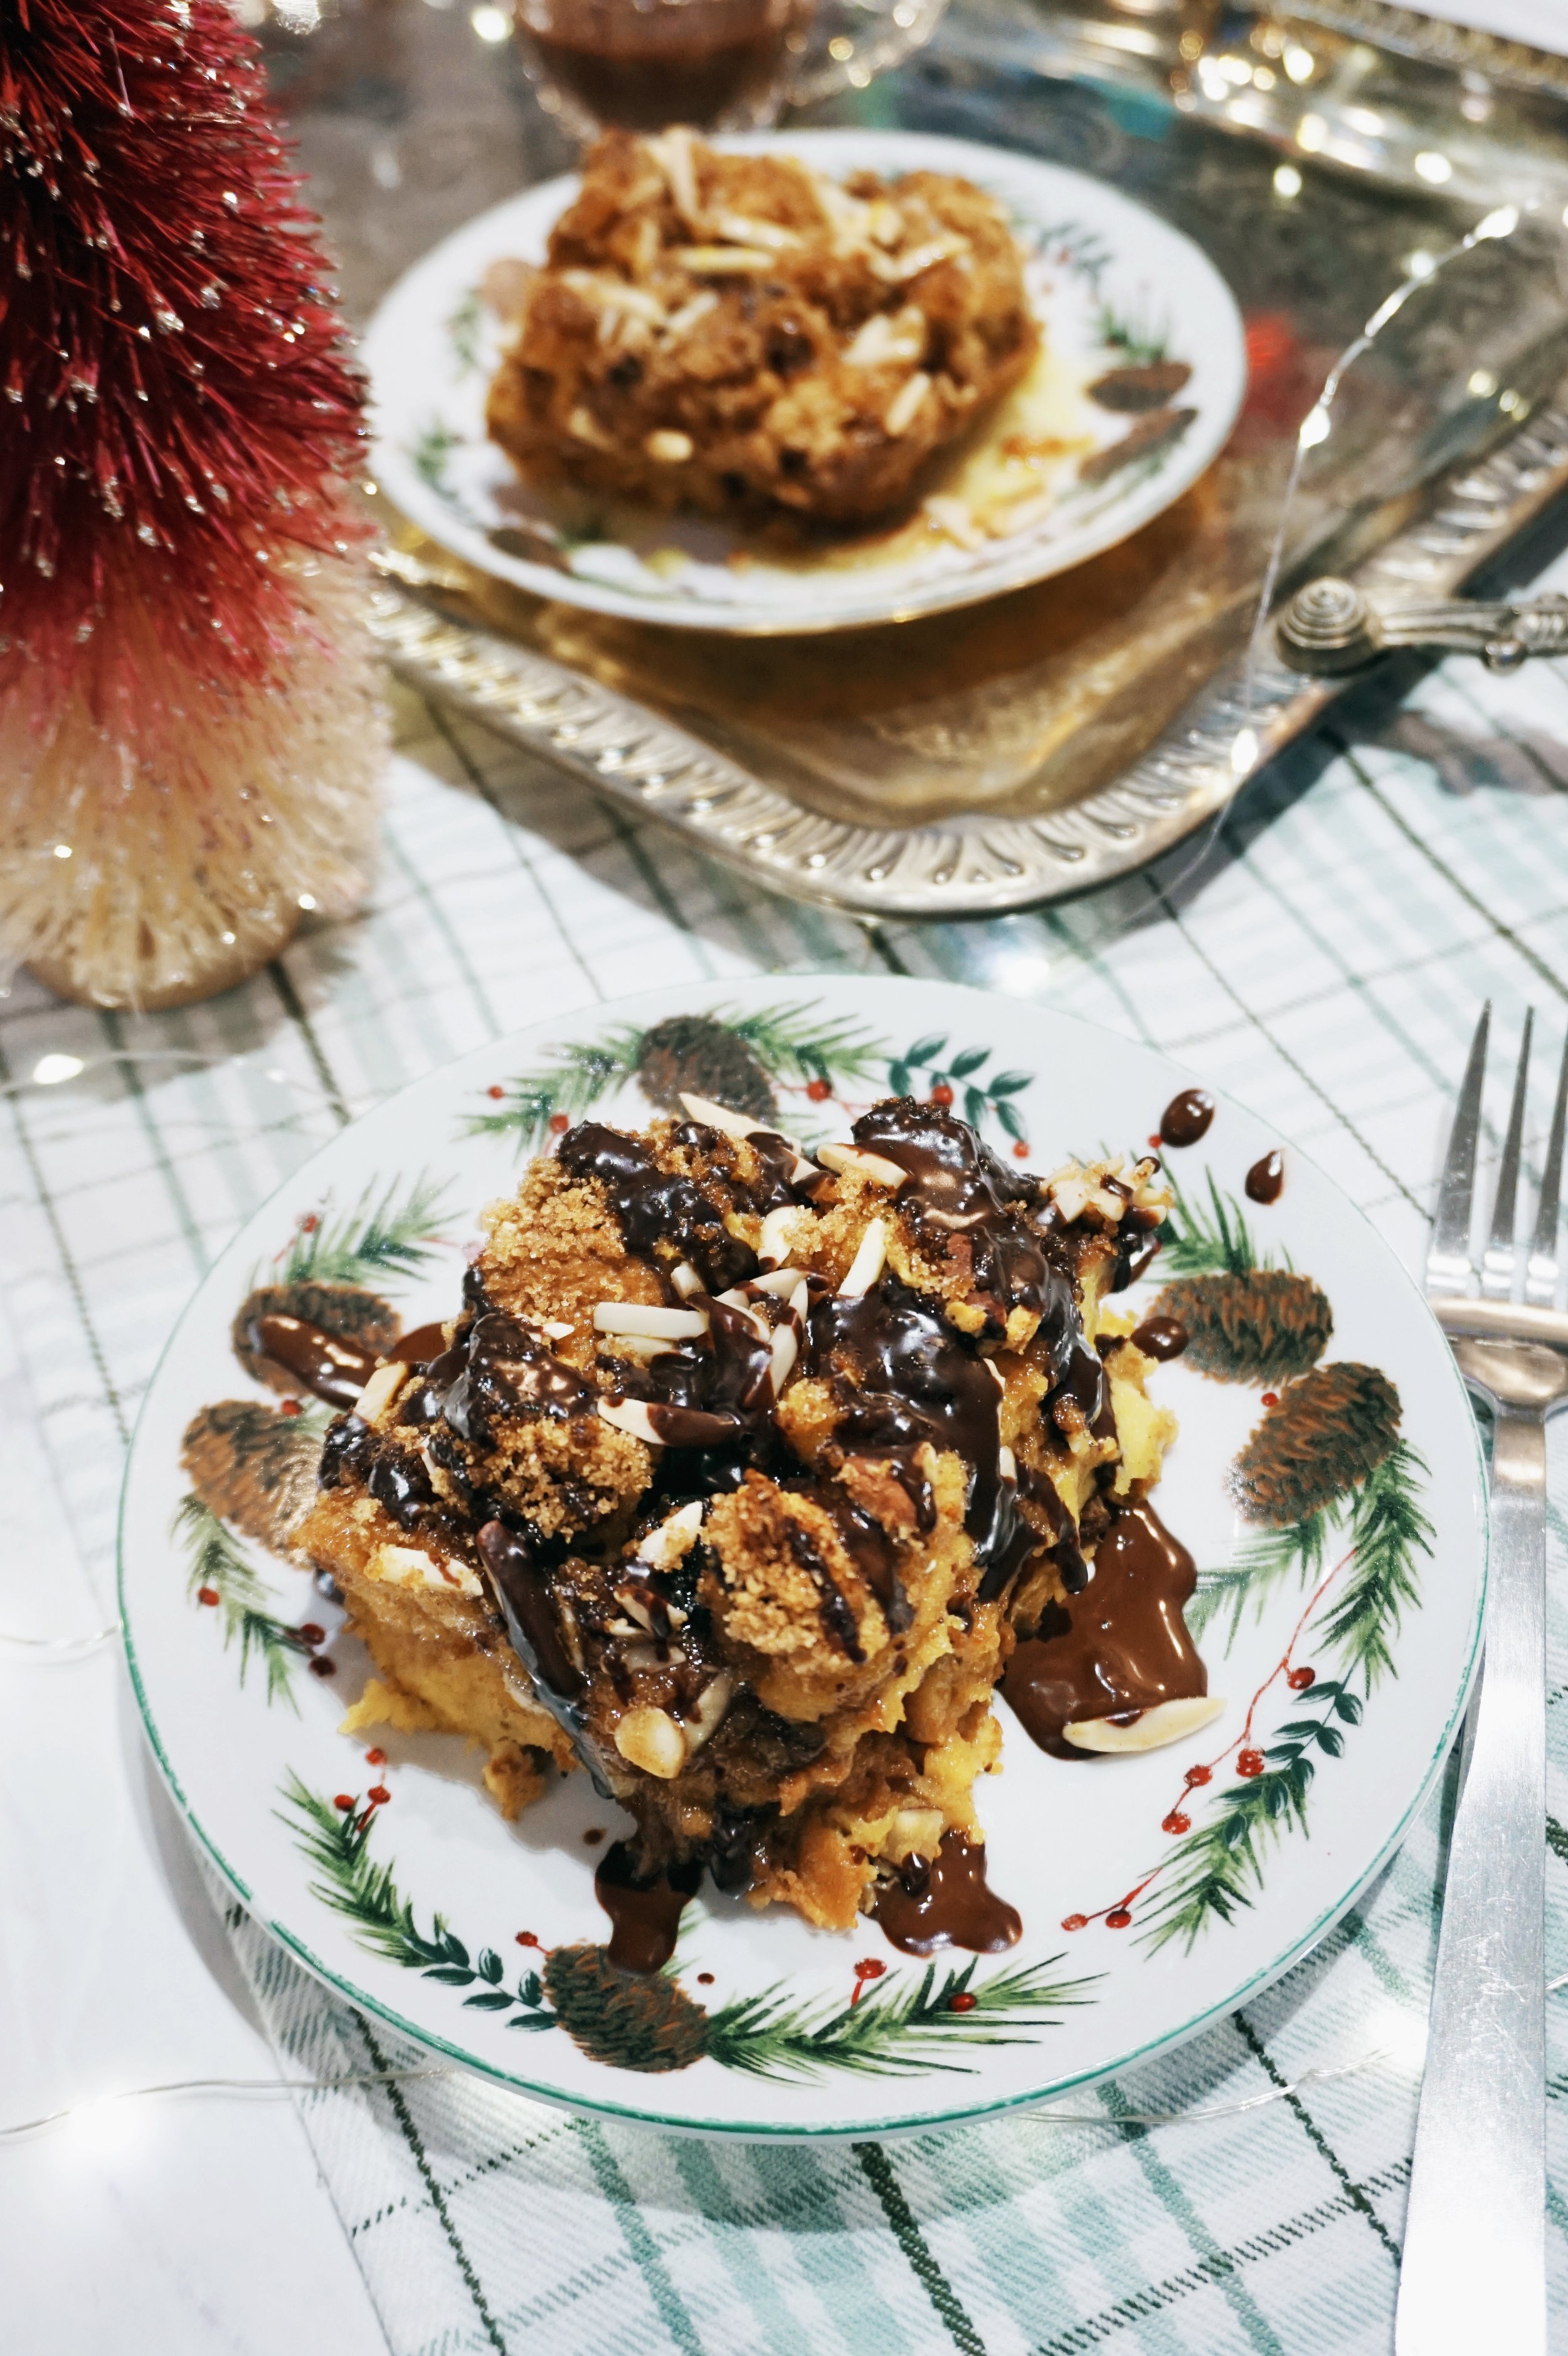
This recipe stems from our family being gifted many panettones throughout the years and never eating one of them. It's not that we don't like them, it's that we just never remember to eat them! This year, when Ivy came home holding a panettone that she had been given, Eve was determined to put it to good use. We both tasted the delightfully spiced and sweet bread spiked with almonds and candied oranges and raisins and knew it would make a delicious baked french toast. This recipe is the perfect breakfast for Christmas morning or one of the lazy days between Christmas and New Year since you make everything ahead of time. The chocolate sauce and orange syrup work equally well with the panettone flavors. Ivy likes hers with both poured on hers!

Tip: This breakfast is decadent enough to be served as a dessert. If so, just call it a "bread pudding"! 

xxx Ivy & Eve

Makes 4 large portions or 6 smaller portions.

Ingredients:

French Toast

  • 1 panettone (around 1 pound)

  • 5 eggs

  • 1 1/4 cups milk or half and half

  • 1 tsp vanilla

  • 1 pinch nutmeg

  • I pinch cinnamon

  • 1 pinch of salt

Topping

  • 1/4 cup slivered almonds

  • 4 tbsp brown sugar

  • 1 pinch nutmeg

  • 1 pinch cinnamon

Orange syrup

  • 4 tbsp melted butter

  • 1 cup powdered sugar

  • Zest from 1 orange

  • 2-3 tbsp orange juice from the zested orange

  • 1.5 tsp vanilla extract

Chocolate sauce

  • 1 cup chopped dark chocolate or semi-sweet chocolate chips

  • 3/4 cup half and half or milk

  • 1 pinch salt

Directions:

To make the french toast:

  1. Grease a 9x9 glass dish or baking pan. 

  2. Cut the panettone into roughly 1-inch cubes. 

  3. Toss the cubes into the baking dish.

  4. Add the milk, eggs, nutmeg, cinnamon, vanilla, and salt to a large mixing bowl. Whisk. 

  5. Pour the eggy mixture over the cubes, gently fold the unsoaked bread under the soaked, making sure each cube is wet. 

  6. Cover and keep in the fridge overnight (or at least 4 hours).

To make the topping:

  • Mix the slivered almonds, brown sugar, nutmeg, and cinnamon.

  • Cover and keep until you bake the french toast. 

To make the orange syrup:

  1. Melt the butter. 

  2. Measure out the powdered sugar into a large bowl.

  3. Add the melted butter, 2 tbsp orange juice, orange zest, and vanilla.

  4. Whisk until smooth. If it is too thin, add more powdered sugar. If it is too thick, add a little more juice. If you have a hard time getting the syrup smooth, microwave it for 5 seconds and whisk again. 

  5. Serve immediately or cover and keep refrigerated until serving. Then warm it in the microwave until it is a syrup consistency again. 

To make the chocolate sauce:

  1. Add the chocolate and 3/4 cup of the half and half (or milk) to a small saucepan on low heat. 

  2. Gently whisk periodically until chocolate is melted.  

  3. If the sauce is too thick to pour, add a little more half and half. 

  4. Serve immediately or let cool and refrigerate until serving, then microwave 15 seconds at a time, stirring between, until warmed and smooth. 

When ready to bake: 

  1. Preheat your oven to 350F. 

  2. Sprinkle the topping over the dish.

  3. Bake for 30-40 minutes, or until the eggy mixture is set and has a lovely golden top.

  4. Serve with melted butter, orange syrup, and chocolate sauce.

  5. Enjoy!

Panettone

Panettone with chocolate sauce

Panettone

Panettone with orange syrup

Panettone
panettone
panettone

Baked Pumpkin French Toast

IMG_1339.JPG

This is one of our favorite cool-weather breakfasts. It is SUPER easy to make and perfect for breakfasts with guests or holiday mornings since you make everything ahead of time and keep it in the fridge overnight. The next morning, just preheat the oven to 350F, add the topping, pop the dish in, and head back to bed to lounge while it bakes! 

xxx Ivy & Eve

Some notes on this recipe: 

  • We don't sweeten the french toast before baking because everyone has their own sweetness preferences. 

  • We use those soft and fluffy "French bread" loaves you get at regular grocery stores, not real French bread loaves. These loaves are easy to find anywhere and are more porous to soak up the eggy mixture easily. We also love how the top bakes to a crispy crunch that works perfectly with the fluffy, moist center. 

  • This recipe makes great leftovers. We usually make this for Sunday morning and reheat the leftovers for tasty weekday breakfasts! 

Ingredients:

French Toast

  • 5 1/2- 7 1/2 cups cubed French bread (about 1 large loaf)

  • 8 eggs

  • 2 1/2 cups milk or half and half

  • 1 cup canned pumpkin puree (not canned pumpkin pie), which is about 1/2 can

  • 2 tsp pumpkin spice

  • 1 1/2 tsp vanilla

  • 1 pinch of salt

Topping

  • 1/2 cup chopped pecans

  • 6 tsp brown sugar

  • 1/2 tsp pumpkin spice

Pumpkin syrup

  • 4 tbsp melted butter

  • 1 cup powdered sugar

  • 2 tbsp milk

  • 1.5 tsp vanilla extract

  • 1 tbsp canned pumpkin puree (not canned pumpkin pie)

  • 1 pinch pumpkin spice

Directions:

To make the french toast:

  1. Grease a 9x13 glass dish or baking pan. 

  2. Slice the bread into around 1.5-inch slices; then tear the slices into irregular cubes. 

  3. Toss the cubes into the baking dish.

  4. In a large mixing bowl, add the milk, eggs, pumpkin puree, pumpkin spice, vanilla, and salt. Mix. 

  5. Pour the eggy mixture over the cubes, gently fold the unsoaked bread under the soaked, making sure each cube is wet. 

  6. Cover and keep in the fridge overnight (or at least 4 hours).

To make the topping:

  1. Mix the chopped pecans, brown sugar, and pumpkin pie spice.

  2. Cover and keep until you bake the french toast. 

To make the pumpkin syrup:

  1. Melt the butter. 

  2. Measure out the powdered sugar into a large bowl.

  3. Add the melted butter, milk, vanilla, pumpkin puree, and pumpkin spice.

  4. Whisk until smooth. If it is too thin, add more powdered sugar. If it is too thick, add a little more milk. If you have a hard time getting the syrup smooth, microwave it for 5 seconds and whisk again. 

  5. Serve immediately or cover and keep refrigerated until serving. Then warm it in the microwave until it is a syrup consistency again. 

When ready to bake: 

  1. Preheat your oven to 350F. 

  2. Sprinkle the topping over the dish.

  3. Bake 35-45 minutes, or until the eggy mixture is set and it has a lovely golden top.

  4. Serve with melted butter, maple syrup, and pumpkin syrup.

  5. Enjoy!

IMG_1345.JPG
IMG_1341.JPG
IMG_1337.jpg
IMG_1342.JPG

Caprese Salad for Every Season

hie-1.jpg

We have sung praise and joy many times about the abundance of fresh fruit, veggies, and delights we have year-round in California. One thing we have had to adapt to since moving away is the idea of seasonal cooking. We're not saying we didn't cook seasonally back home, but we took advantage of the fact we could always find decent ripe tomatoes and other produce year-round. In Virginia, the tomato season is a HUGE deal. When the first Hanover tomatoes hit the grocery store and farmers markets, people practically run to buy them, and every restaurant's specials list includes some type of tomato dish. We took advantage of the tomato season this summer. With that wrapping up, we wanted to share our favorite recipe highlighting our beloved savory fruit: the Caprese Salad, with some tips and tricks to recreate this dish year-round. We recommend pairing Caprese Salad with unoaked or lightly oaked Chardonnay or nice crisp Sauvignon Blanc.

xxx Ivy & Eve

Tips:

Oil & Vinegar: 

Since this recipe is so simple, it's the perfect excuse to use your best olive oil and vinegar. We love playing with different oil and vinegar combinations from our favorite hometown producer of oils and vinegar: Quail & Olive. Some of our favorite combinations right now are Basil olive oil with Winter Ambrosia vinegar and Tuscan Blend olive oil with either Mission Fig or Raspberry Basil vinegar.

We use another of our favorite olive oils from Holman Ranch, which happens to make some of our favorite Pinot Noirs too! 

hie-4.jpg
hie-5.jpg

Seasoning:

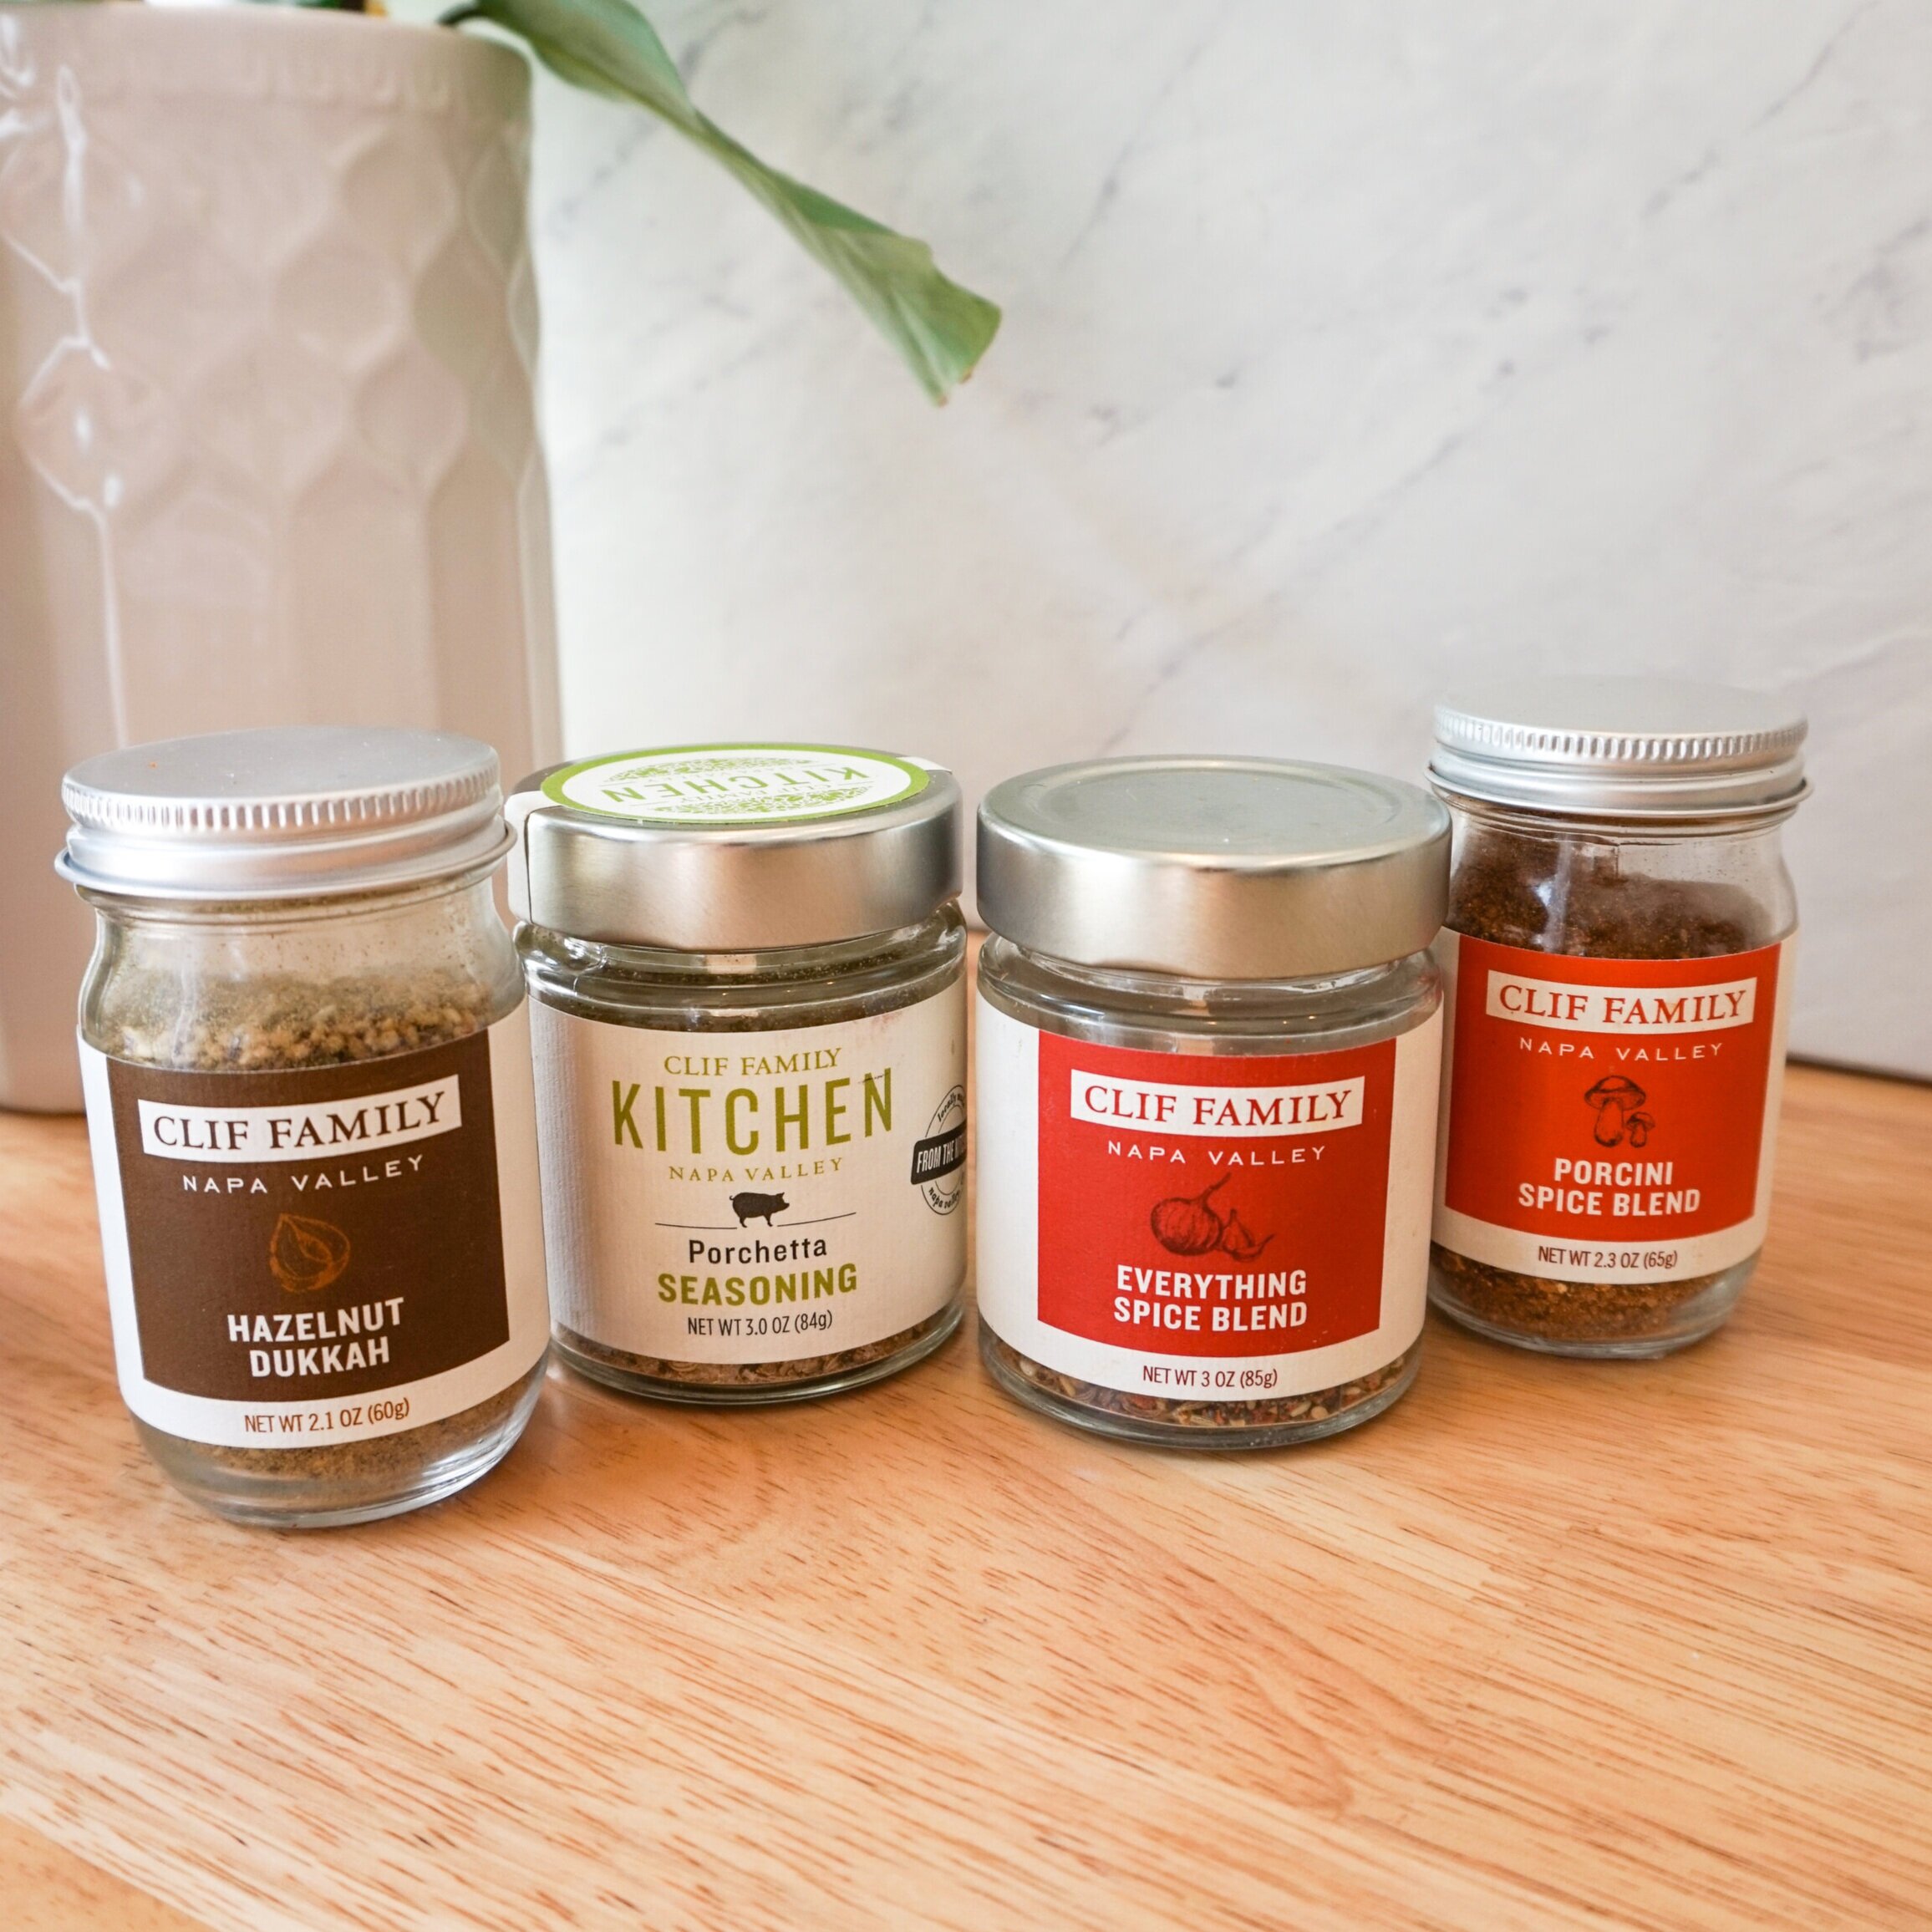
This is also a perfect recipe to use fancy salts and fresh cracked pepper or swap them with those fancy seasonings you might have lurking in our spice drawer. We've been loving Clif Family's spice blends, Everything Spice Blend and Porchetta Spice Blend. For salt, we use Maldon or Hawk Head Whisky Smoked Chili Salt that we picked up the last time we were in Scotland.

hie-7.jpg
hie-6.jpg

Dressings:

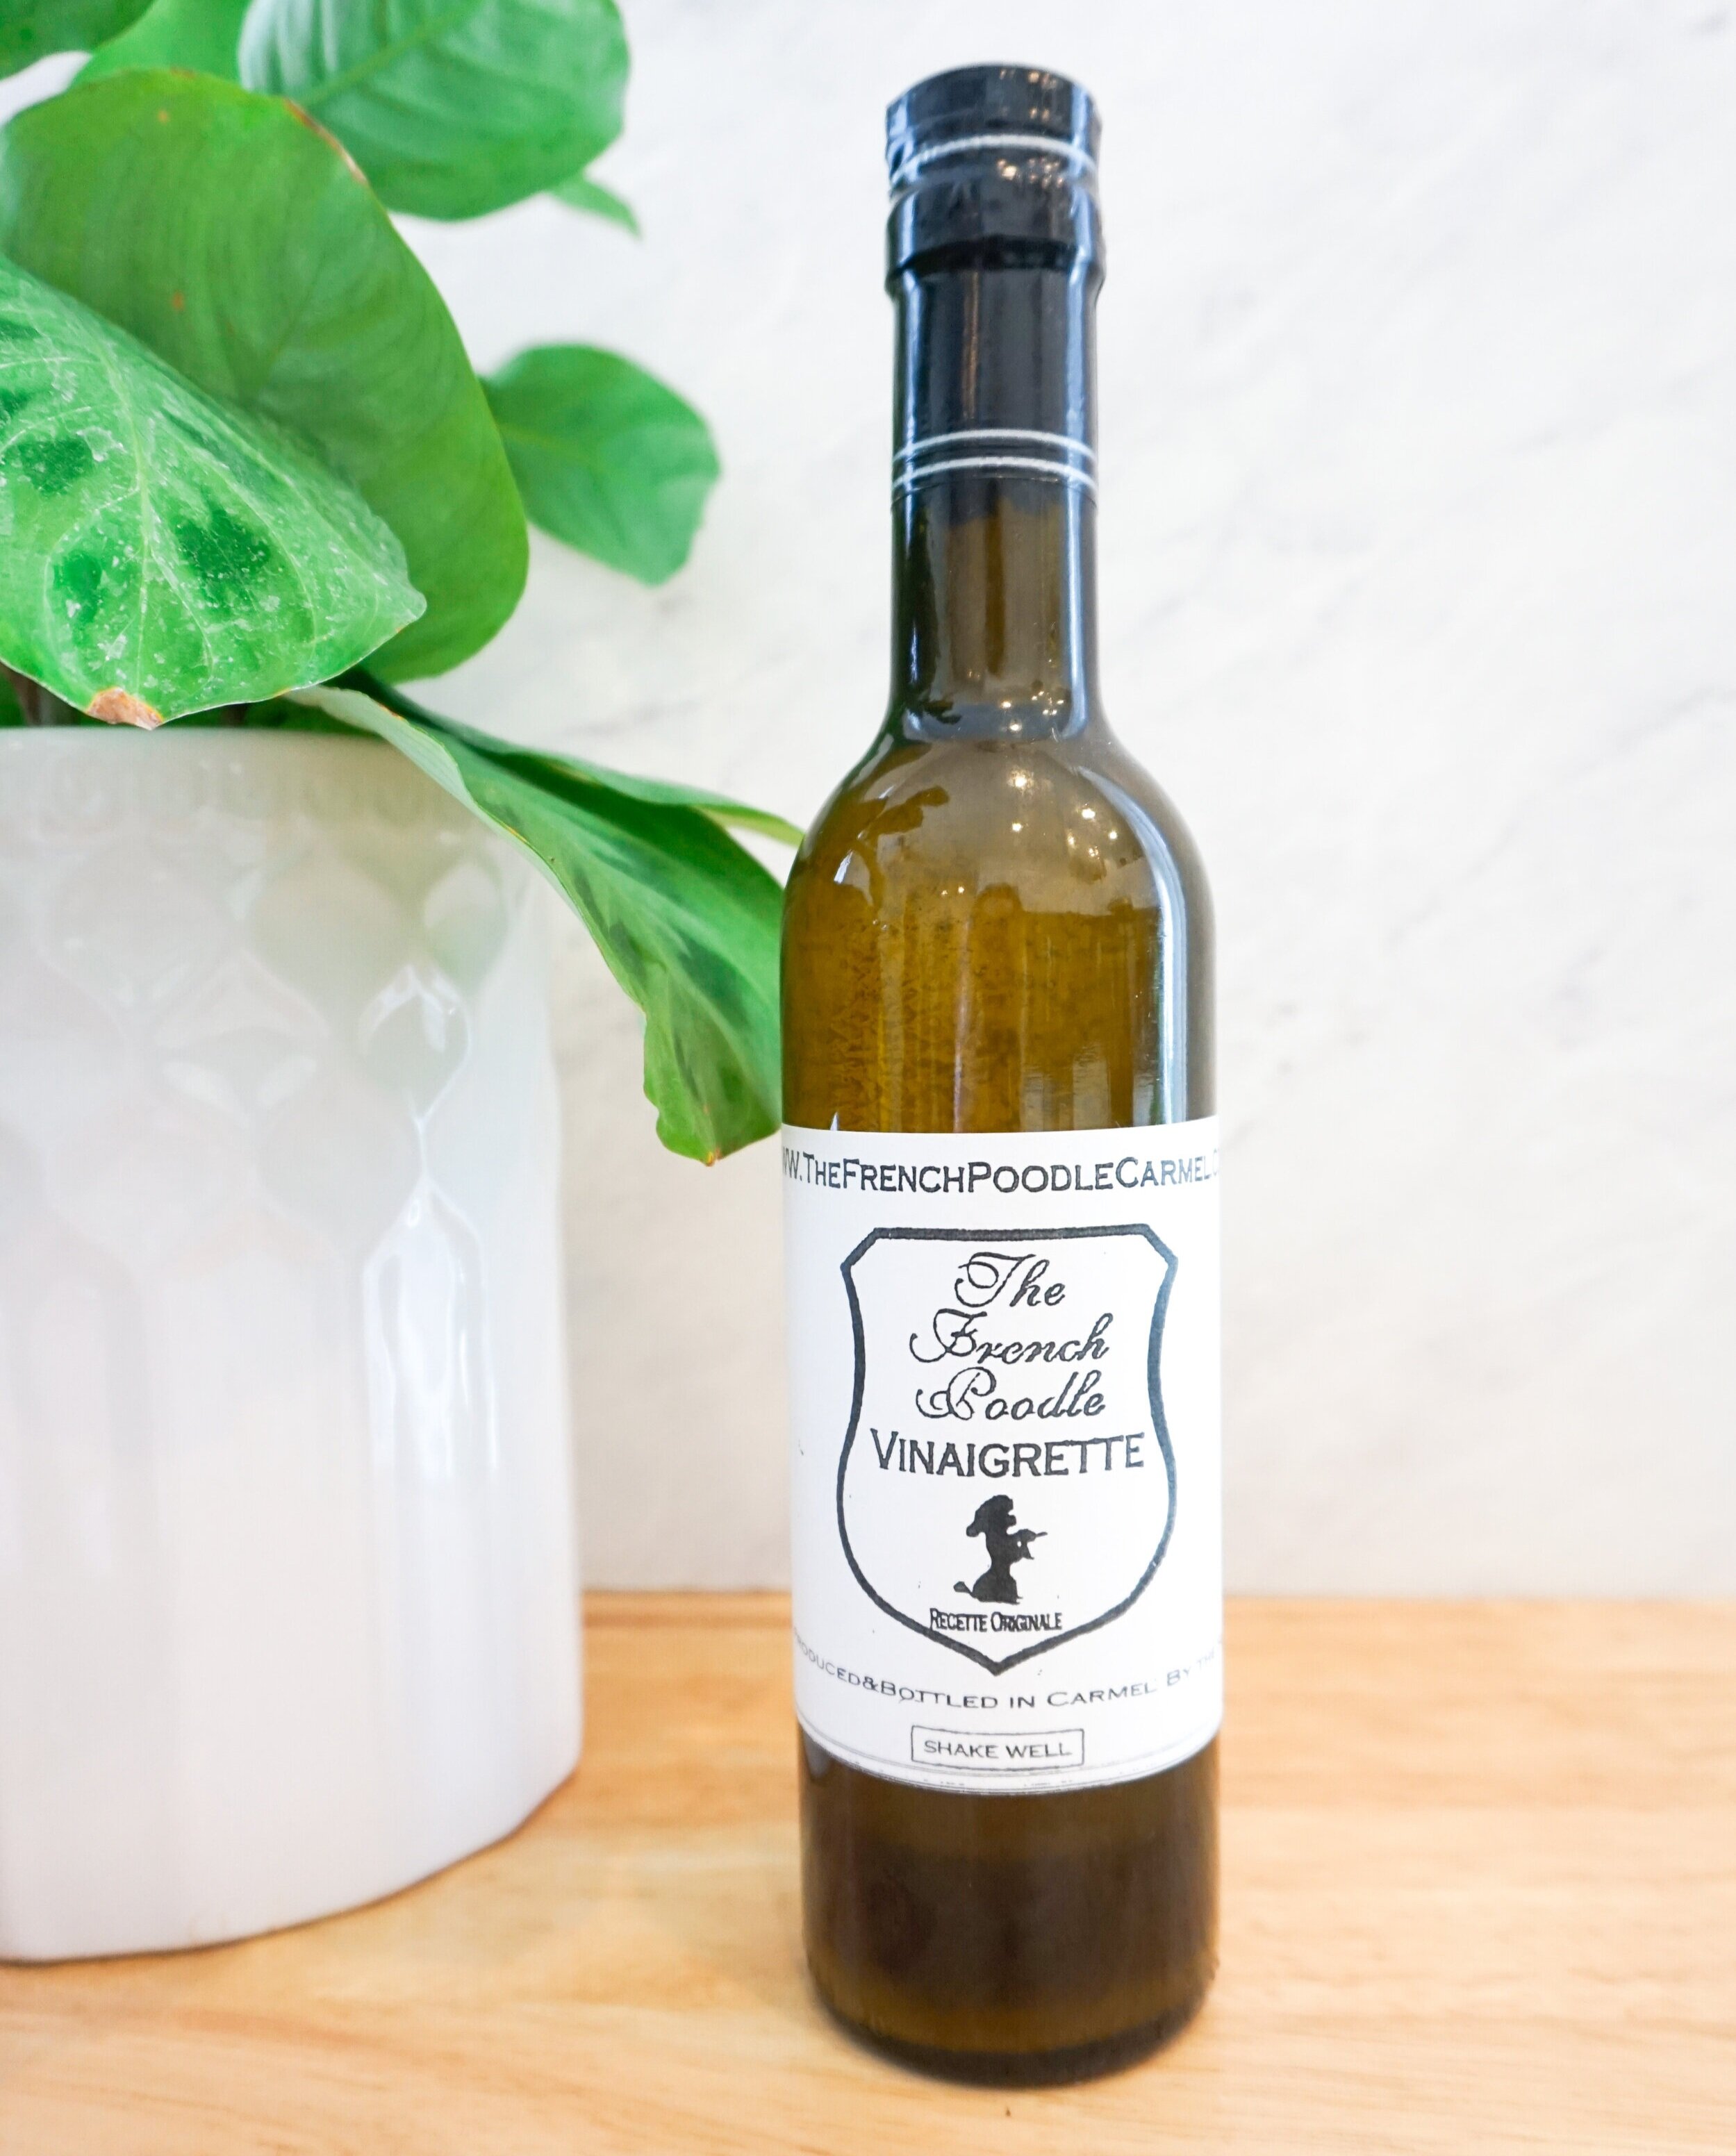
Another fun way to dress your Caprese salad is to use a bottled dressing. We tend to use lighter, vinaigrette type dressings, and our absolute favorite is French Poodle Vinaigrette. The recipe originated from Cote d'Azur in 1870 and made its way to our hometown in 1961 when Marienette and Jean Beacham opened The French Poodle restaurant in Carmel, CA. The recipe remains a secret, and now you can buy it online or in select shops. 

image0+%281%29.jpg

Seasonal Produce:

When tomatoes are out of season, we love to play with different produce. Here are a few of our favorite combinations: 

Spring/Summer:

  • Traditional Caprese - Tomato + Mozzarella + Holman Ranch Olive Oil + good balsamic

  • Nectarine or Peach + Burrata + Tarragon (Previously featured here)

Fall/Winter: 

  • Roasted Tomato + Burrata or Mozzarella torn into small chunks (we roast cherry tomatoes with fresh thyme tossed in olive oil at 400F for about 40 minutes)

  • Persimmon + Mozzarella + Quail & Olive Basil Olive Oil + Quail & Olive Winter Ambrosia Vinegar

Make it a Meal:

When we're serving this as a main dish and want to make it more substantial, we like to serve it on a bed of arugula, add shredded rotisserie chicken, and double the oil and vinegar. It would also be delicious with some homemade croutons to soak up a bit of the dressing!

image.jpg
hie-3.jpg

Here is our tried and true recipe for a classic (but delicious) Caprese Salad. Feel free to add or sub any of the ingredients with your own favorites!

Serves 2.

Ingredients:

  • 2-3 medium ripe tomatoes, sliced 1/4-inch thick

  • 1 ball of fresh mozzarella cheese, sliced into 1/4-inch-thick rounds

  • A handful of fresh basil leaves

  • Flaky salt

  • Freshly cracked pepper

  • 1 tablespoon extra-virgin olive oil

  • 1 tablespoon good quality balsamic vinegar (this is the time to break out the good stuff)

Directions:

  1. On two salad plates (or one large serving dish if serving family-style), arrange the tomato and mozzarella slices in an alternating pattern. 

  2. Tear and scatter basil leaves on top of the tomatoes and mozzarella. 

  3. Season with fresh cracked pepper and flaky salt. 

  4. Drizzle with olive oil first, then balsamic vinegar. 

  5. Enjoy! 

DSC00130.jpg

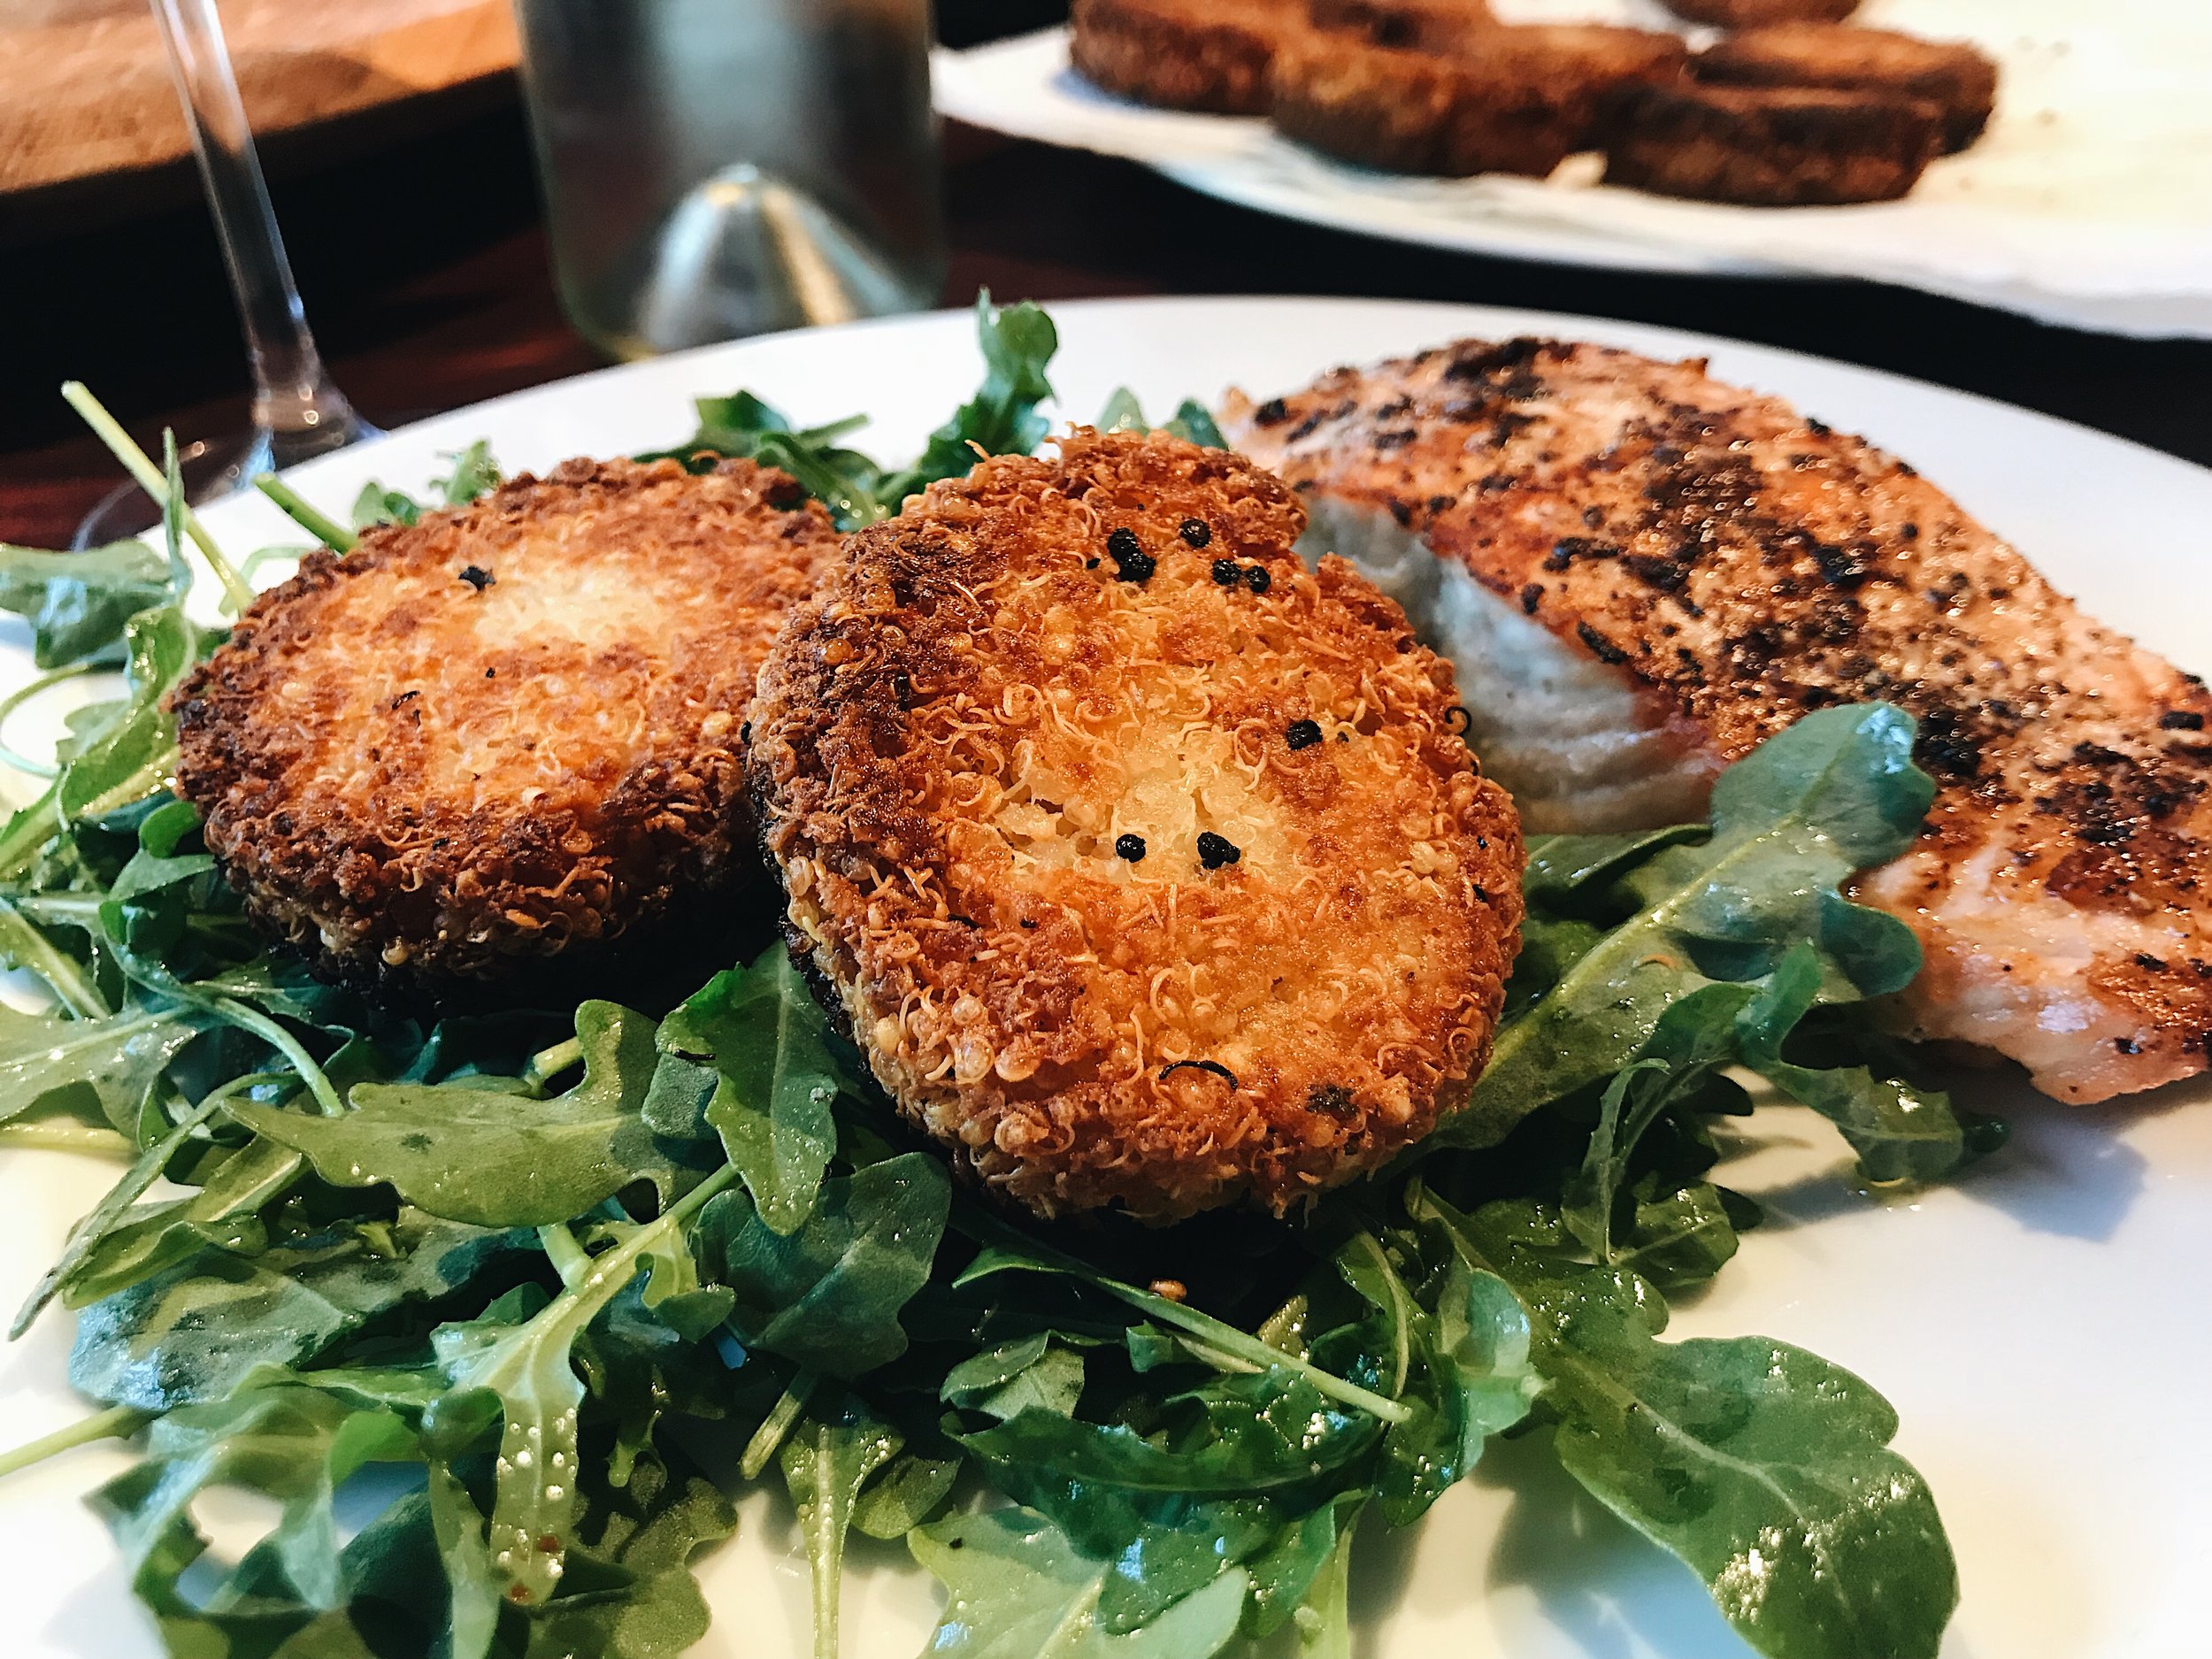
Crispy Cheesy Quinoa Fritters + Simple Salad

3C671FAA-E056-40D7-85AC-53A38E285350.JPG

One of our favorite things about summer is al fresco dining. We spend a lot of time lounging by the pool or reading books under the shady wisteria trellis. When it comes to dinnertime, the last thing we want to do is spend an hour in the hot kitchen, so we tend to make quick meals and do LOTS of grilling. This recipe uses only a few ingredients and is super quick, allowing for more time to enjoy the meal with a crisp glass of grenache blanc and friends. To make it a more complete meal, serve it with simple grilled or broiled salmon. On its own, it makes a great lunchtime meal!

xxx Ivy & Eve

Serves 4.

Ingredients:

For the fritters...

  • 1/2 cup dry quinoa

  • 1 tbsp butter (optional but always preferred!)

  • 1 cup cooking liquid (we use 1/2 water, 1/2 chicken or veggie broth)

  • 1/4 tsp salt (plus more to taste)

  • Fresh cracked pepper

  • 1 tsp herbs de Provence (or your favorite herb mix)

  • 1/4 cup freshly grated parmesan

  • 6 tbsp fresh goat cheese

For the salad...

  • 6 cups arugula

  • 2 tbsp olive oil

  • 2 tbsp fresh lemon juice

  • Flaky salt (we use Maldon)

  • Fresh cracked pepper

Directions:

  1. Cook the quinoa (the steps below share how Eve likes to cook hers).

    • a. In a pot, add the dry quinoa and butter and toast on medium heat until slightly golden and toasty scented.

    • b. Add the cooking liquid and salt and bring to a boil. Reduce to a simmer, cover the pot, and cook for about 15 minutes until the quinoa is tender and the liquid is absorbed.

    • c. Take the pot off the heat and fluff the quinoa with a fork and let cool a few minutes.

  2. Add the cheeses, herbs, and salt and pepper. Stir until the cheeses are all melted and let sit to cool enough to form the patties with your hands.

  3. Form into 8 patties, each about 2 inches in diameter.

  4. In a nonstick pan, heat the olive oil over medium heat (adding more as needed) until shimmering and add the patties to the oil.

  5. Pan-fry for about 4 minutes on each side (until golden brown).

  6. Transfer onto a plate lined with paper towels to drain.

  7. To make the salad, add the arugula to a large bowl. Dress with the olive oil, lemon juice, salt and pepper, and toss.

  8. Serve the salad with the quinoa patties on top!

  9. Enjoy!


02B7B71D-D027-40DC-8358-738F3C39EFA1.JPG
54F3570D-CAC9-4701-99AC-46CFFFF1896A.JPG
2CCC4FE7-120C-437B-8D28-EA1B81D6BF04.JPG
59CFB89C-388E-401B-892F-7B1F36B7F9AD.JPG

Adapted from Food52 here

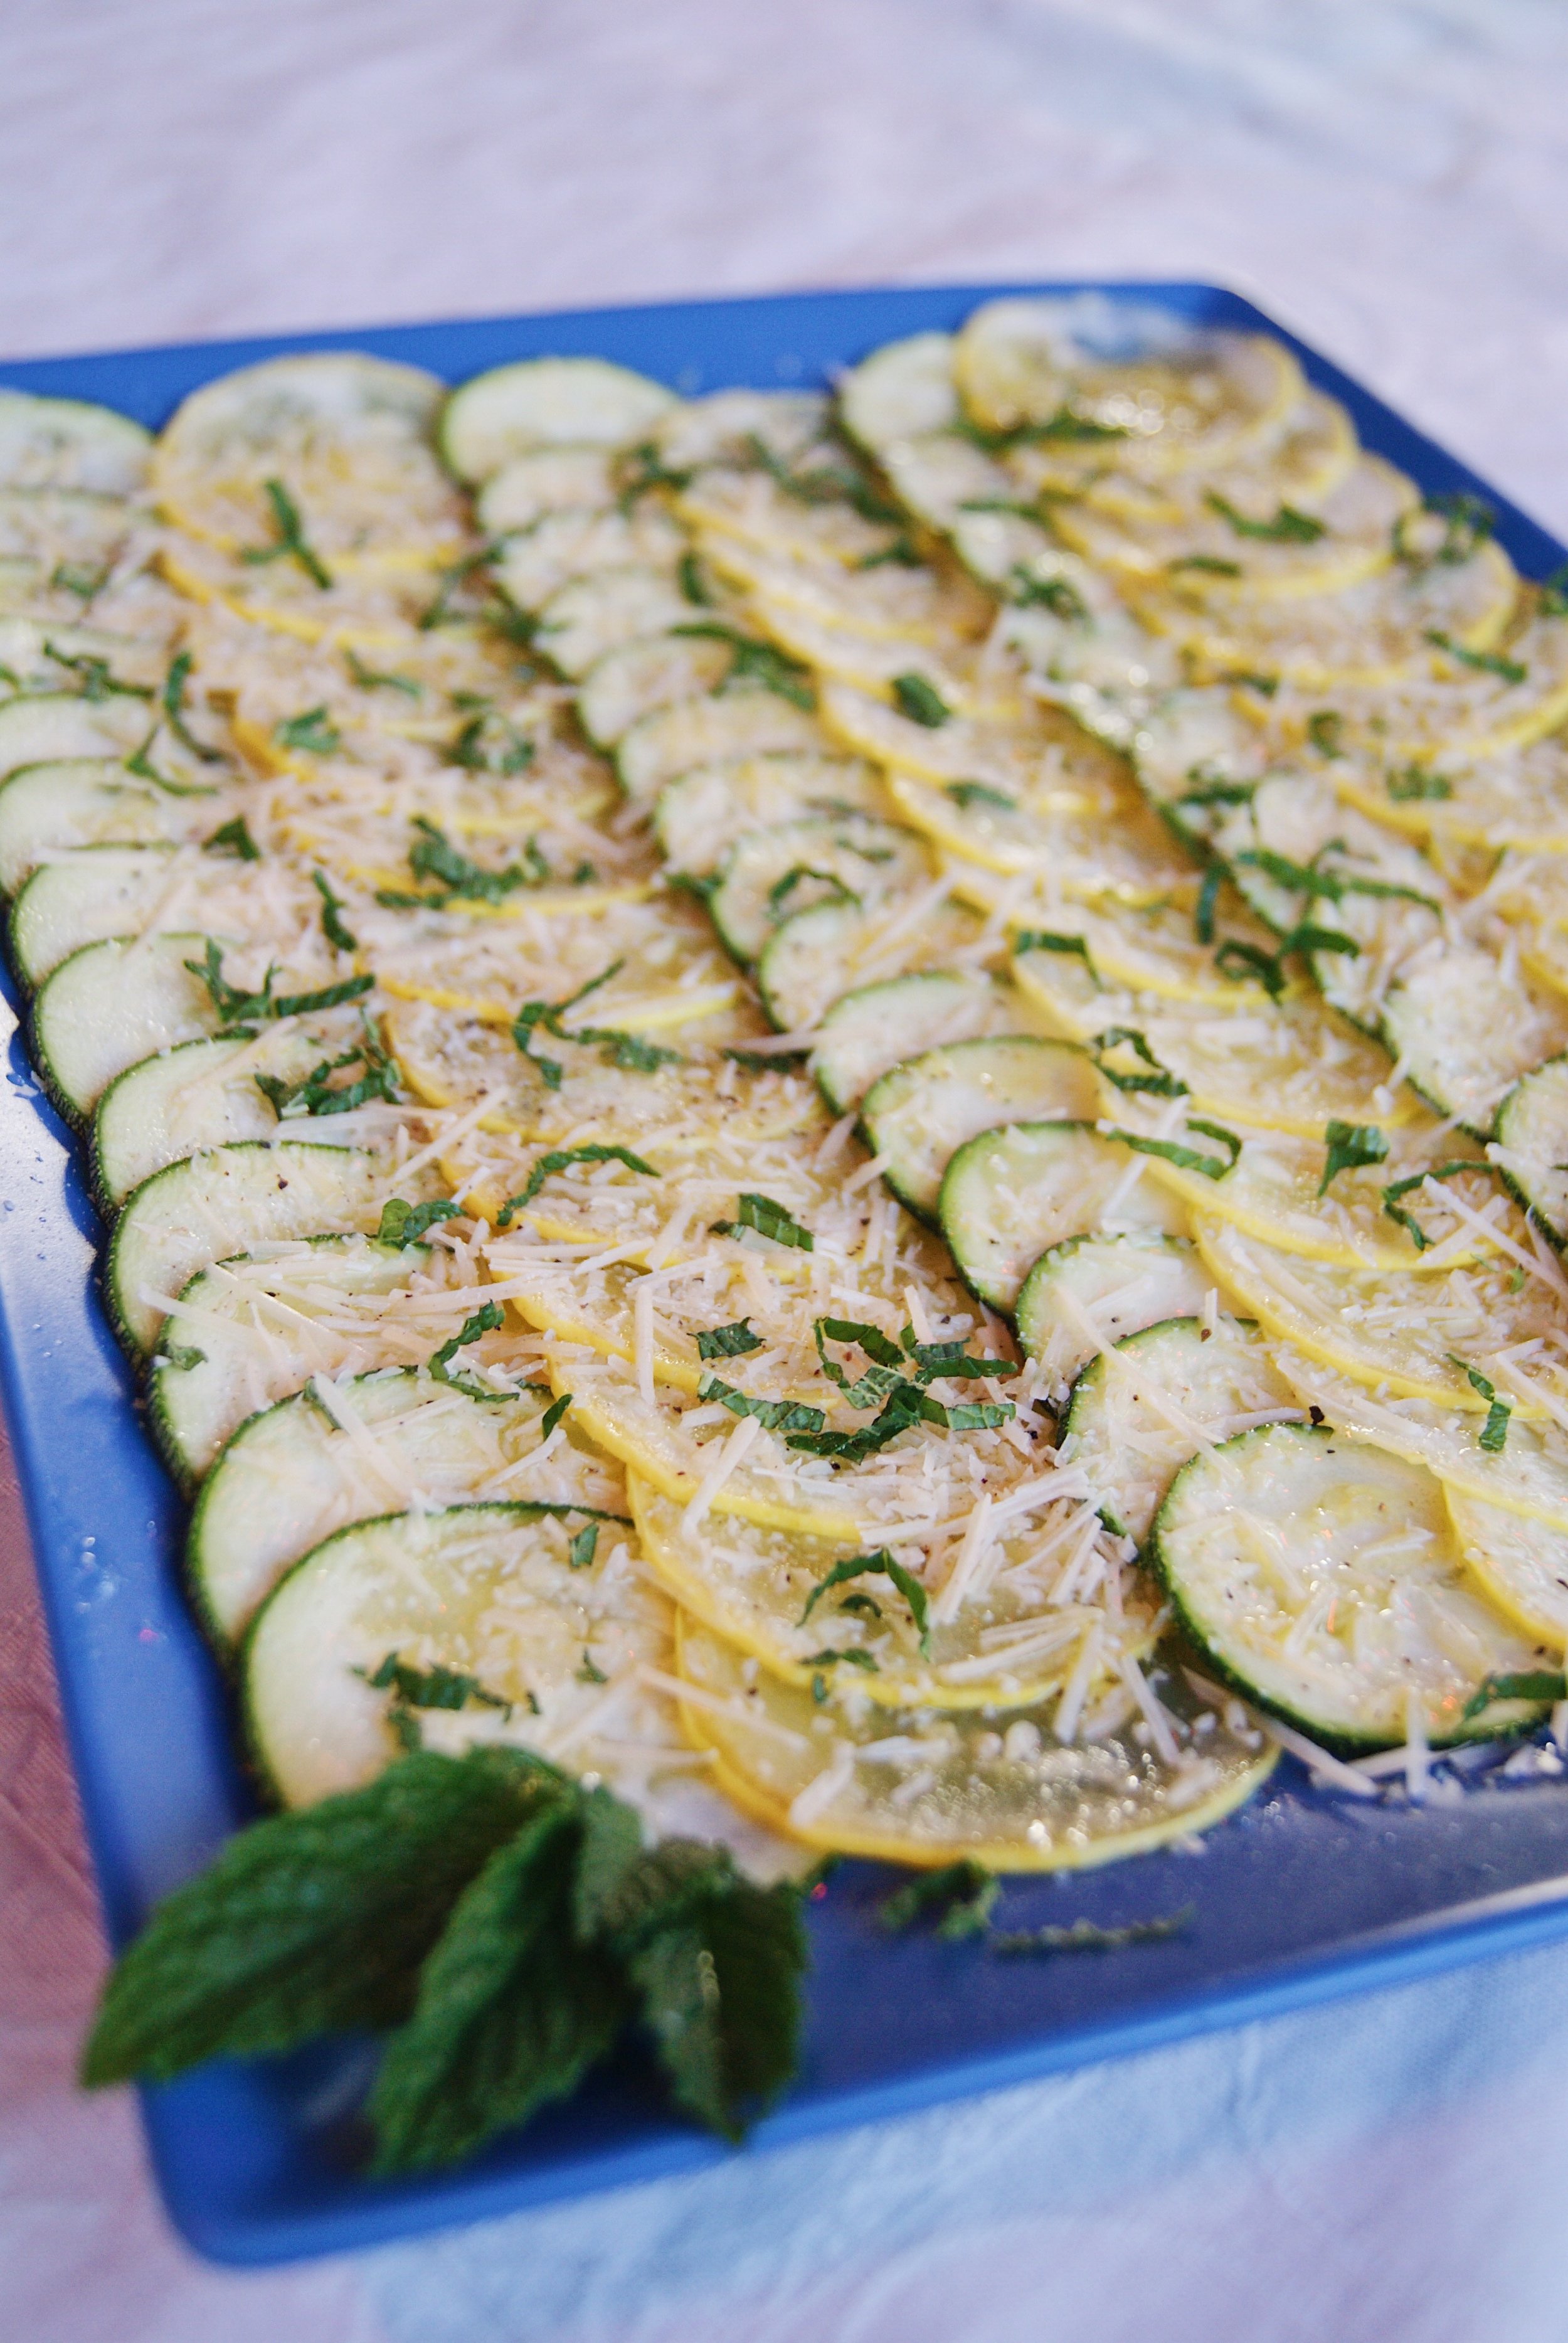
Zucchini Carpaccio

3A089CA0-6810-4832-8CC6-9CD9004B6799.JPG

Beef carpaccio is one of our Dad's favorite dishes. Whenever we go out to eat, if any kind of carpaccio is on the menu, he must try it. A few summer's ago, we came across a recipe in some magazine for Zucchini Carpaccio and tested it out. We have since forgotten where the recipe came from and just use the recipe we made up. This dish is a great summer starter for any meal. We like to serve it on a giant platter where everyone can grab what they want and go back for more. You could also make it on individual plates for a more formal dinner. You can swap out the mint for any fresh herb (we sometimes make it with tarragon). This dish is super versatile! 

xxx Ivy & Eve

Serves 4 as an appetizer or side dish

Ingredients:

2 large zucchini

2 tablespoons olive oil

1 lemon

1/3 cup parmesan cheese, grated (grate your own cheese, it is always better that way)

5-7 mint leaves

salt and pepper

mandoline slicer (We got ours from OXO)

Directions:

  1. Slice the zucchinis very thinly with the mandoline. 
  2. Arrange on a platter, overlapping the slices slightly in one layer.
  3. Stack the mint leaves on top of each other and cut into fine slivers.
  4. Drizzle with olive oil.
  5. Sprinkle with parmesan cheese.
  6. Season with salt and pepper.
  7. Squeeze the juice of 1/2 of a lemon on the top.
  8. Sprinkle the mint on top.
  9. Enjoy!
7C131161-5471-4025-B046-F4437D93C14D.JPG

The Perfect Cream Tea (Clotted Cream & Scone Recipe)

There are few things in this world Ivy loves more than a good cream tea. She even has a framed print on her wall (see below) that says, "I love you more than cream tea and scones"...and most days she doesn't know if that's a true statement! Can she truly love anything more than cream tea and scones?

Cream tea is really simple. Cream tea consists of clotted cream, scones, a bit of jam, and hot tea. Both the scones and the clotted cream take relatively no effort (but they do require a bit of planning). It's the perfect way to enjoy your tea-time without the expense and overindulgence of traditional afternoon tea. We really enjoy ordering cream tea when we visit England.

For quite some years, we went about life here in the U.S. without cream tea and only survived by planning our future visits to England. But times changed, and our hunger for cream tea went savage. We needed cream tea and we needed it NOW! So we decided to try and make it ourselves. Now that we have learned how to make cream tea we don't know why we went so many years without!

Clotted Cream

Ingredients:

  • 1-quart heavy whipping cream (not ultrapasteurized, but it can be pasteurized)
  • A low baking dish (best to be long and wide so the cream is about an 1 1/2 thick when poured in)

Directions:

Clotted cream is crazy simple. All you have to do is turn your oven to the lowest setting we set ours to 150F. Then you pour the cream into the baking dish and put it in the oven for 12 hours (we put ours in at night so in the morning we can take it out). After 12 hours remove the dish from the oven and let it cool. Cover with plastic wrap and place in refrigerator. We leave ours in the pan until the following morning when we plan to have our cream tea. When you are ready to serve, skim the thick creamy top off of the watery bottom (looks like skim milk) and place the clotted cream in a bowl or jar. This only keeps for a few days so eat up! Keep refrigerated. 

Vanilla Bean Scones

Ingredients:

  • 2 1/2 cups self-rising flour
  • 1 tbsp caster sugar
  • 1-ounce butter, chopped
  • 3/4 cup milk
  • 1/2 cup water
  • 1 vanilla bean (optional)

Directions:

  1. Preheat oven to 425F. 
  2. Combine flour and sugar in a bowl. Using your fingers rub in butter until it is lightly mixed.
  3.  In a separate bowl add milk and water and scrape vanilla bean seeds into the mixture. Discard the bean shell. Add milk mixture to flour mixture.
  4. Using a butter knife, mix to create a soft, sticky dough. Flour surface and knead dough until smooth.
  5. Roll out gently to 1 1/2 inch thick. Cut out circles with cookie cutter or the top of a plastic cup.
  6. Place on ungreased baking sheet. Lightly brush milk on the tops of the scones and sprinkle with sugar. 
  7. Bake for 12-15 minutes, or until tops of scones start to turn golden.
  8. Serve scones with clotted cream, jam, and a pot of tea.

Enjoy!

xxx Ivy & Eve

                              hopskipjumppaper.com 

                              hopskipjumppaper.com 

Tasty Coconut Clusters

We have been in the mood for coconut. What better way to eat coconut than in a yummy cookie?! We found some recipes for coconut "almond joy" cookies and loved the idea of a coconut cookie that is chewy but also crunchy and packed with flavor. After looking at about 100 different recipes, we created our recipe. The main difference from those we found is that we toast our almonds for extra toasty flavor and add fancy sea salt to the "dough" and to the top of the cookies. These have already become a huge hit with our family and friends.

Warning: These are addictive.

Enjoy! 

xxx Ivy & Eve

Makes approximately 20 cookies. 

Ingredients

  • 1 1/2 cup unsweetened shredded coconut
  • 1 cup dark chocolate chips (or whatever kind of chocolate chips you have)
  • 1/2 cup sliced almonds, toasted
  • 1 cup sweetened condensed milk
  • 1/2 tsp sea salt (the fancier the better) plus more for sprinkling on top

Directions

  1. Preheat the oven to 325 degrees F.
  2. Line 2 cookie sheets with parchment paper.
  3. Toast the sliced almonds in a small skillet until lightly golden. Let cool.  
  4. Mix all ingredients in a large bowl.
  5. Scoop large spoonfuls onto the parchment paper.
  6. Slightly pat the mounds down.
  7. Sprinkle with quality sea salt.
  8. Bake for 15-20 minutes. Until the cookies are golden around the edges.
  9. Let cool and enjoy!

Goat Cheese and Sweet Potato Wontons

These little bundles of joy are perfect for making with friends and family. They are pretty simple to make, and fun to fill. You can make the filling ahead of time and have everyone pitch in to fill the wonton wrappers. These are a perfect and tasty vegetarian appetizer and pair perfectly with a glass of bubbly or mimosas. We will surely be serving them at our next get together!

xxx Ivy & Eve

TIP: This recipe calls for what we, in the US, call sweet potatoes (which are true sweet potatoes) but in most grocery stores, they are labeled yams. Very confusing, we know. Here is an article from The Kitchn that explains it.

Makes around 30 wontons and dipping sauce.

Ingredients

  • 1 large sweet potato

  • 2/3 cup goat cheese

  • Package of wonton wrappers

  • Vegetable oil

  • Salt & pepper

  • 1/2 cup fresh squeezed orange juice (or fresh store bought)

  • 2 tsp grated ginger

  • 1 heaping tsp honey

Directions

  1. Prick the sweet potato all over with a fork, and microwave on a plate for 7-10 minutes, or until soft. Set aside and let cool a bit.

  2. In a small bowl, mix the fresh squeezed orange juice (we juiced our own), ginger, and honey in a small bowl. Set aside until ready to serve.

  3. Scoop the cooked sweet potato into a large bowl and discard the skin. Mash until smooth.

  4. Add the 1/2 of the goat cheese to the bowl, season with salt and pepper, and mix until smooth.

  5. Add the other 1/2 of the goat cheese and mix lightly. You want some goat cheese chunks in the mix.

  6. Fill each square wonton wrapper with 1 tsp of the mix to the center of the wrapper.

  7. Lightly wet the edges of the wrapper with water (using your finger) and fold diagonally.

  8. Gently squeeze the air out of the pocket and seal the edges.

  9. Heat about 1 inch of vegetable oil in a pan on the stove.

  10. Once hot, drop 1 filled wonton into the oil. Flip once after about 5 seconds and take the wonton out once the edges of the wrapper begin to brown. Place on a paper towel. The wonton will continue to brown after you take it out of the oil.

  11. Repeat until all of the wontons are fried.

  12. Serve on a large plate with the orange ginger honey dipping sauce.

  13. Enjoy!

Sugar Dusted Cranberries

We love gifts, and we love giving gifts to people, so each Holiday season we like to give a little something to everyone we know. Since gifting can get expensive we often make our gifts. This year we are handing out candied nuts, christmas cookies, and these delicious sugar dusted cranberries. These are the perfect gift to give party hosts, coworkers, and friends. This recipe is simple, delicious, and we love how the cranberries look like they have been dusted by snow! We usually wrap them up in a cute jar and hand them out, but they are also perfect for garnish on cocktails (cocktail recipe coming later this week).

xxx Ivy & Eve 

Ingredients:

  • 1 bag of cranberries 12 oz
  • 4 cup granulated sugar (may use less)
  • 1 cup water

Directions:

  1. Combine sugar and water in saucepan. Heat up until the sugar is fully dissolved creating a simple syrup. Remove from heat. Make sure the mixture is not boiling or it can cause cranberries split or pop in the next step.
  2. Transfer simple syrup into large bowl
  3. Pour cranberries into simple syrup, mixing to coat each berry.
  4. Let mixture sit in refrigerator over night (if you are short on time a few hours will work).
  5. Remove mixture from refrigerator. Separate syrup from cranberries (keep the syrup to use for cocktails!).
  6. Pour some sugar into a small bowl and spoon out cranberries onto the sugar.
  7. Roll cranberries in sugar till they are fully coated with sugar. Add sugar to bowl as needed.
  8. Set on baking rack to dry. (1-2 hours)

Enjoy!

Icebox Pumpkin Pie

As much as we love autumn, for us Californians, fall weather really doesn't begin until pretty late in the season. On the Central Coast, we still enjoy weekends by the pool and lots of warm sunshine until late October. We wanted to make a pumpkin pie a few weekends ago, but it was so hot out that we didn't want to turn the oven on! We loved our Magically Delicious Pie so much that we decided to make a pumpkin version. We chose to use Cinnamon Toast Crunch for the base, which works wonderfully with the pumpkin filling. We like to serve ours pretty frozen, but if you want more of a soft and fluffy texture, just take the pie out a little longer than we suggest. This is a perfect potluck dish because since you freeze it until serving, you can keep it in the freezer until you leave and let it defrost on the way!

We are sure this recipe is soon to be a new favorite!

xxx Ivy & Eve


Makes one pie with 12 small slices.

Ingredients:

  • 1 box Cinnamon Toast Crunch

  • 8 tablespoons melted butter

  • 2 cups heavy cream

  • 1/4 cup powdered sugar

  • One 7 oz. jar of marshmallow fluff (about 1 1/2 cups)

  • 8 oz. cream cheese, softened

  • 3/4 cup canned pumpkin

  • 1 1/2 tsp pumpkin pie spice

Directions:

  1. Preheat the oven to 400F degrees. 

  2. Melt the butter in a small bowl.

  3. Add 6 cups of the cereal to the food processor. Pulse until you get fine crumbs. Pour in the melted butter and pulse until all the crumbs are moistened.

  4. Pour the crumbs into a 9-inch pie pan and press mixture on the bottom and around the sides to form the pie crust.

  5. Place the crust in the oven and bake for 5-7 minutes until it is slightly golden. Then place the crust in the freezer to cool while you prepare the filling.

  6.  Whip the heavy cream in a mixer until it starts to thicken and then add powdered sugar. Whip until stiff peaks form. Place the whipped cream in the refrigerator while you make the other mixture.

  7. Beat the softened cream cheese and marshmallow fluff with an electric mixer until light and fluffy (about 5 minutes). Add the pumpkin and pumpkin spice then mix until incorporated. Fold in the whipped cream. 

  8. Pour the mix into the chilled pie crust and smooth with a spatula.

  9. Lightly crush 1/2 cup of Cinnamon Toast Crunch in a Ziploc baggie and sprinkle on the edges of the pie filling.

  10.  Freeze for at least 3 hours. When it is time to serve, take it out of the freezer and slightly let soften for 10 minutes.

  11. Slice and serve! 

IMG_0199.jpg

Pumpkin Palooza at Trader Joe's

Pumpkin season is in full swing and nobody does it better than Trader Joe's. They have a whole section including over 60 different items made with pumpkin. They call this area "Pumpkin Palooza"! We decided to go to our local Trader Joe's market and try out as many pumpkin goodies as we could. Here's only a fraction of what they carry. Hurry to your local store to test them out yourself!

xxx Ivy & Eve

Not technically pumpkin but SO delicious!

Not technically pumpkin but SO delicious!

Pumpkin Pie Spiced Pork Tenderloin with Roasted Autumn Veg

Growing up, we had dinner as a family every week night. We helped cook sometimes, and learned a lot of great recipes and techniques. Now we are older, we understand the importance of eating a full meal each night. Not only is cooking a great way to wind down from a busy day, but having a full balanced meal helps keep us away from over snacking and eating delicious but super unhealthy things (like a bag of chips or a pint of ice cream). 

This is why we created a recipe that is healthy, tasty, and super quick and easy! This one-pan recipe has all our favorite fall flavors and seasonal vegetables. Pork tenderloin is also one of the easiest meats to cook. Adding it on top of some simple roasted veg makes this one of the simplest recipes we've made! We are sure this will become a fall staple of yours. We serve it with a simple salad with our favorite balsamic dijon salad dressing. 

This one-pan recipe pairs perfectly with Louis Jadot Pinot Noir. This Pinot Noir comes from the Burgundy appellation of France and has notes of cherry, plums, and a hint of earthiness. We think it goes perfectly with the earthy roasted veg and the slight sweetness of the pumpkin pie spice rub. 

xxx Ivy & Eve

Serves 4

Pair with Louis Jadot Pinot Noir

Ingredients

  • 1 1/2 pound pork tenderloin
  • 1 1/2 tsp pumpkin pie spice
  • 1 tsp garlic powder
  • 1 tsp salt
  • 1/4 tsp pepper
  • 2 red potatoes
  • 2 sweet potatoes
  • 1 bulb fennel, sliced
  • 2 pears
  • 1 onion
  • 1/4 cup plus 3 tbsp olive oil
  • 2 tbsp balsamic vinegar
  • 2 tsp dijon mustard
  • 1 tbsp honey
  • 1 bag of Arugula
  • Salt and pepper

Directions

  1. Preheat the oven to 400F
  2. Rinse and dry the pork tenderloin.
  3. Combine the spices in a small bowl and rub onto the pork tenderloin.
  4. Peel and cube the potatoes and sweet potatoes.
  5. Slice the onion and fennel bulb.
  6. Core and slice the pears.
  7. Toss the vegetables with tbsp olive oil and season with salt and pepper.
  8. Roast the vegetables in a large roasting pan for 30 minutes.
  9. Rub the pork tenderloin with 1 tbsp olive oil and place on top of the vegetables.
  10. Turn the oven up to 425F and roast for 30 minutes or until the internal temperature reads 160F on a meat thermometer.
  11. Let the pork rest for 3 minuted before slicing.
  12. Combine all the olive oil, balsamic, mustard, and honey and whisk.
  13. Season with salt and pepper.
  14. Drizzle over a large bowl of arugula and toss.
  15. Plate the pork, veg, and salad and enjoy with a glass (or two) of Louis Jadot Pinot Noir!

Autumn Harvest Pizza

This autumn, we are taking full advantage of all the delicious produce we can find at our local farmers market. This pizza combines the warm comfort of pureed butternut squash, creaminess of the cheese, the saltiness of the prosciutto, the sweetness of fresh pears, and for a bit of added freshness, it is topped with arugula and pomegranate seeds. The crust has the added subtleness of sage, which goes perfectly with the autumn flavors.

We usually would pair pizza with red wine, but since this pizza has no tomato sauce and lots of creamy cheese, white wine is the way to go! We paired this tasty pizza with Louis Jadot Pouilly-Fuissรฉ. Pouilly-Fuissรฉ is a vineyard appellation in southern Burgundy that produces mainly white wines. This wine is made from chardonnay grapes and has delicious citrus, peach, and crisp apple notes. The subtle oak really rounds out this white wine, making it very versatile. We would also pair it with chicken, fish, and creamy cheeses.

xxx Ivy & Eve

Makes four individual-sized pizzas.

Ingredients

Pizza Dough

  • 4 cups flour

  • 2 tsp salt

  • 2 tsp dried crushed sage

  • 1/8th tsp pepper

  • 1 2/3 cups warm water

  • 1 packet dry yeast (1/4 oz. or 7 grams)

Toppings

  • Butternut squash

  • Goat cheese

  • Mozzarella, grated

  • Prosciutto, torn into small pieces

  • Pear, thinly sliced

  • Pomegranate seeds

  • Arugula

Directions

For the Dough

  1. Dissolve the yeast in the warm water.

  2. Combine all dry ingredients in a large bowl or mixer and make a well in the center.

  3. Add the yeast and water and mix well.

  4. Knead until the dough is silky and elastic (If you have it, use a standing mixer with a dough hook attachment).

  5. Cover the bowl with a tea towel and set in a warm place for 30 minutes to rise.

  6. Divide the dough into 4 balls and place on a large baking sheet lined with parchment. Place the balls 3 inches apart and rub the tops with a little olive oil.

  7. Cover with plastic wrap and refrigerate overnight (if you're in a rush, skip this step and let rise for another hour).

  8. When you are ready to make the pizzas, take out the dough at least 1 hour before baking.

For the Toppings

  1. Preheat the oven to 400F degrees.

  2. Peel and cube the butternut squash. Toss with 1 tbsp olive oil and roast for 30 minutes, or until tender.

  3. Place the roasted squash in a blender or food processor and puree. Add 1 tbsp of water if the puree is too thick.

  4. Preheat the oven to 500F degrees (525F if your oven gets that hot).

  5. Generously sprinkle pizza sheet or upside-down cookie sheet with cornmeal.

  6. Using floured hands, take 1 ball of dough and stretch into an 8-10 inch circle on the cornmeal surface (re-flouring when needed).

  7. Spread the butternut puree on the dough like you would pizza sauce.

  8. Top with grated mozzarella, prosciutto, dollops of goat cheese, and pear slices.

  9. Bake for 7-9 minutes until the crust is golden and toppings are melted and bubbling.

  10. Top with 1/2 arugula and 1/4 cup pomegranate seeds.

  11. Repeat with the remaining 3 balls of dough.

  12. Slice and enjoy with a glass of Louis Jadot Pouilly-Fuissรฉ!

Pumpkin Chocolate Chip Cookies

Fall is one of our favorite seasons because we love comfy sweaters, the leaves changing color, and most of all...pumpkin recipes! There are so many different pumpkin recipes we love to make this time of year and we cannot wait to share some with you. Up first is the BEST pumpkin chocolate chip cookies. With the added pumpkin puree they stay more moist then your average chocolate chip cookie. These are seriously delicious and the flavor is exactly of how we imagine autumn to taste. You may want to make 2 batches as they disappear before your eyes!

Warning: We are not responsible for any cookie addictions this post may create!

xxx Ivy & Eve

Ingredients:

  • 15 oz. pumpkin puree
  • 1 egg
  • 1/2 cup vegetable oil
  • 1 cup sugar
  • 2 cups flour
  • 2 tsp baking powder
  • 1/2 tbsp ground cinnamon
  • 1/2 tsp salt
  • 1 tsp baking soda
  • 1 tsp milk
  • 1 tbsp vanilla extract
  • 16 oz. semi-sweet chocolate chips

Directions:

  1. Preheat oven to 350 F.
  2. Combine pumpkin, vegetable oil, egg, and sugar in a mixing bowl. In a separate bowl mix together the flour, cinnamon, baking powder, and salt.
  3. Dissolve the baking soda into the milk. Mix this into the bowl of wet ingredients.
  4. Add the dry mixture to the wet mixture.
  5. Add the vanilla and chocolate chips. Mix well.
  6. Drop heaping spoonfuls of the dough onto a cookie sheet lined with parchment paper.
  7. Bake for 8-12 minutes (depending on the size it may be more, we make ours BIG).
  8. Remove from oven, let cool on baking sheet for 3 minutes.
  9. Place on cooling rack.

Enjoy!

Blueberry-Lavender Tart

Between the two of us, Eve has always been the baker. Ivy would always help Eve bake cupcakes and tarts but would never try to make something entirely on her own. However, once Eve was away at college Ivy had no one to bake sweets for her, so she had to take matters into her own hands. Ivy saw a recipe in Martha Stewart Living for mini blueberry-lavender cornmeal tarts. Not only did the photos look delicious, but it combined basically everything she loves...blueberries, lavender, and cream! Ivy decided to try and make the tart in a big tart pan instead of little mini pans to limit her chances of burning them (remember Ivy was not a skilled baker compared to Eve). The tart was pretty simple and it turned out perfect the first time! We recently tried it with gluten free crust to accommodate some of our friends diet restrictions and it tasted great! We have listed both the cornmeal and gluten free crust recipes below. Ever since, this recipe has been one of our go-to tarts to make for summer parties because it is light but still hits the sweet spot. 

xxx Ivy & Eve

Recipe adapted from Martha Stewart Living

Ingredients

Cream:

1 cup heavy whipping cream

1 1/2 to 2 tablespoon culinary lavender (depends on how strong you want the flavor)

1-2 tablespoons of sugar (optional)

Cornmeal Crust:

1 cup all-purpose flour, plus more for dusting

1/4 cup finely ground cornmeal

1 tablespoon plus 1 1/2 teaspoons sugar

1/2 teaspoon coarse salt

1 stick plus 2 tablespoons cold unsalted butter, cut into small pieces

1 large egg yolk

2 tablespoons ice water

Gluten Free Crust:

1 1/2 cups gluten free flour (we suggest Trader Joe's or Bob's Red Mill)

2 tablespoons sugar

1 pinch salt

7 tablespoons cold butter (sliced into pieces)

1-3 tablespoons cold water to bind

Filling:

2 tablespoons sugar

1/4 vanilla bean, seeds scraped

1 to 2 cups fresh wild or regular blueberries or huckleberries

Directions

  1. Cream: Place the cream and lavender in a sauce pan on the stove. Bring just to a boil (as if you were making tea) and remove from heat and cover. Let the cream and lavender "steep" till cool. Once cooled refrigerate.

  2. Two options Cornmeal or Gluten Free Crust

    1. Cornmeal: Combine sugar, cornmeal, flour, and salt in a food processor. Once mixed evenly add butter and pulse till the texture looks like coarse crumbs. Then add the yolk and ice water, pulse again till mixture is dough like. Knead dough until it is smooth. Then shape into a disk and wrap with plastic wrap and refrigerate at least 30 minutes. After 30 minutes or more take dough out and let it warm to room temperature. Roll it out with a little flour to around 1/8 inch thick. Then transfer to tart pan. Pressing dough to the sides and stab the dough with a fork along the bottom. Put back in the refrigerator for another 30 minutes.

    2. Gluten Free: Combine the flour, sugar, salt, and butter in a food processor. Pulse till the texture looks like coarse crumbs. Add a little bit of water while pulsing until the dough combines and looks like pebbles. Then shape into a disk and wrap with plastic wrap and refrigerate at least 30 minutes. Roll it out with a little flour to around 1/8 inch thick. Then transfer to tart pan. Pressing dough to the sides and stab the dough with a fork along the bottom. Put back in the refrigerator for another 30 minutes.

  3. Two options Cornmeal or Gluten Free Crust

    1. Cornmeal: Preheat oven to 350 degrees. Once you have waited 30 minutes, take the tart pan out of the fridge and place tart pan on baking sheet. Bake till golden brown, make sure to watch the bottom of the tart, sometimes it puffs up (press it down if it puffs up). It should bake around 25 minutes. Remove from oven and let cool.

    2. Gluten Free: Preheat the oven to 400 degrees. Once you have waited 30 minutes, take the tart pan out of the fridge and place tart pan on baking sheet. Bake for 20-30 minutes until the edges are starting to golden. Remove from oven and let cool. 

  4. Filling: Wait to do this until right before serving. Remove the cream/lavender from the fridge and use a mesh strainer to separate the lavender from the cream into a mixing bowl. Once sifted you should have lavender infused cream. Add sugar, and vanilla bean seeds to cream. Mix on medium till peaks start to appear. Pour onto cool tart crust, spread evenly. Top with berries and sprinkle a pinch or two dried lavender on top and serve.

Variations: If you choose to use small tart tins, decrease the time for baking the tart shells significantly! They should only take about 10-15 minutes max to bake. Keep an eye on them and never leave the kitchen while baking tart shells. 

Enjoy!

Magically Delicious Pie

DSC00280.jpg

As children, we spent part of our summer vacations on Lake Erie in Ohio visiting our Grandma C and many aunts uncles and cousins. Those weeks were the highlight of summer, spending the hot and humid days swimming in the lake, walking down the street to buy candy at the corner shop, and convincing the adults to drive us to our favorite drive-in restaurant, White Turkey, AT LEAST once a day. Another perk of being at Grandma's was that she always had sugary sweet cereals and treats in her house during our visits. All the cousins would come down stairs each morning and pour a bowl of their favorite cereal and plan the adventures to be had that day. Our personal favorite was a big bowl of Lucky Charms (We affectionately called them Monkey Germs lol). This pie is a frozen take on our beloved cereal. This recipe transports us back to Grandmas house by the lake. We can almost feel the warm breeze drifting off the lakeshore and hear the distant rumble of a coming thunderstorm. 

xxx Ivy & Eve

Adapted from The Slow Roasted Italian.

Makes one pie with 12 small slices.

Ingredients:

  • 1 box Lucky Charms Cereal

  • 8 tablespoons melted butter

  • One 7 oz. jar of marshmallow fluff (about 1 1/2 cups)

  • 8 oz. cream cheese, softened

  • 2 cups heavy cream

  • 1/4 cup powdered sugar

Directions:

  1. Preheat the oven to 400 degrees. 

  2. Separate the cereal and the marshmallows into two separate bowls.

  3. Melt the butter in a small bowl.

  4. Add 4 cups of the cereal to the bowl of a food processor. Pulse until your mixture is crumbs. Pour in the melted butter and pulse until all the crumbs are moistened.

  5. Pour the crumbs into a 9 inch pie pan and press mixture on the bottom and around the sides to form the pie crust.

  6. Place the crust in the oven and bake for 5-7 minutes until it is slightly golden. Then place the crust in the freezer to cool while you prepare the filling.

  7.  Whip the heavy cream with a mixer until you can starts to thicken and then add powdered sugar. Whip until stiff peaks form. Place the whipped cream in the refrigerator while you make the other mixture.

  8. Beat the cream cheese and marshmallow fluff with an electric mixer until light and fluffy (about 5 minutes). Fold in 1/2 of the whipped cream and a 1/2 cup of the Lucky Charms marshmallows. Pour the mix into the chilled pie crust and smooth with a spatula. Pour remaining whipped cream over top and sprinkle the remaining marshmallows around the edge of the pie. Freeze for at least 3 hours. When it is time to serve, take it out of the freezer and let soften for 10 minutes.

  9. Slice and serve! 

Watermelon Lime Basil Popsicles

Midsummer in the Valley brings high temps and if you're lucky, long days spent by the pool. This past weekend was no exception, and we decided to concoct a popsicle recipe for something tasty and refreshing. Watermelon was our choice for the base, light, refreshing, and crisp. We then picked a lime to add some zing, ending with a little basil. Summer fruits are naturally sweet so we didn't use any added sugar making them surprisingly healthy. We used our Zoku Quick Pop Maker which freezes popsicles in as little as 15 minutes! We ended up eating the whole batch before we even thought about cleaning up! We think these little pops turned out perfectly. They are refreshing and ready for a poolside staycation!

xxx Ivy & Eve

ย 

Makes 6 Zoku quick pops or 6 regular popsicles.

Ingredients:

  • Diced fresh seedless watermelon
  • 1 Lime (juice)
  • 2-3 Basil leaves

Directions:

  1. Dice watermelon into cubes, place in blender. Blend till you make around 2 cups liquid. 
  2. Squeeze 1 lime into watermelon slurry. blend for 30 seconds.
  3. Place 2-3 leaves of basil in blender. (amount depends on preference). Blend till pieces are small but not tiny. (size is also up to preference).
  4. Pour mixture into popsicle molds. We use the Zoku Quick Pop Maker.
  5. If you use the Zoku Quick Pop Maker let freeze according to directions, making 2 batches for a total of 6 pops. 
  6. If you use a regular popsicle mold, place in freezer for a few hours until frozen. 
  7. Serve or Store!

Nectarine and Burrata Salad

We are lucky that our hometown has fantastic farmers markets year-round. We try to shop them as often as possible, buying the seasons freshest produce and supporting the small local farmers. In the summer, we love to pick up nectarines and other summer stone fruits to use in recipes and to eat by themselves. Nectarine and burrata salad is one of our favorite summer dishes. You can use white or yellow nectarines, or some of each, which we like to do! It is perfect for serving as an appetizer or alongside something light like grilled chicken. To make this dish more substantial, you can serve it on a bed of arugula with fresh baguette on the side.

xxx Ivy & Eve

Serves 4 as a side dish, 2 as a main.

Ingredients

  • 3 large nectarines halved (4 if small), pitted, and sliced into 1/2 inch slices

  • One burrata cheese ball (we got ours at Whole Foods)

  • Olive oil for drizzling

  • 1 tablespoon of tarragon leaves, stems removed and roughly chopped

  • Flaky sea salt

  • Pepper

  • Arugula (optional)

  • Freshly sliced baguette (optional)

Directions

  1. If using arugula, arrange it on a large platter.

  2. Add the nectarine slices neatly - slightly overlapping the slices in the middle of the platter (or on the arugula)

  3. Slice the burrata in half and then tear the cheese into smaller pieces (it will be messy and gooey) onto the slices of nectarines. YUM!

  4. Sprinkle the tarragon leaves on the top.

  5. Season with salt and pepper.

  6. Drizzle with olive oil.

  7. Serve with sliced baguette. (optional)

  8. Enjoy!

Biscuit Roses de Reims- Cookies You Dip in Champagne!

During our recent trip to Reims (see full post here), the champagne capital of the world, we passed Maison Fossier, whose windows were filled with adorable tins and bags filled with rectangular pink biscuits. Naturally, we had to go inside the shop to see what these little pink biscuits were all about. Walking in, we were immediately surrounded by the warmth and delicate sweet scent of sugar and vanilla. Best of all, there was PINK everywhere! We sampled one of these pink beauties, and with one bite, we were in love! They have the texture of an un-soaked ladyfinger and are subtly sweet with a touch of vanillaโ€”a perfect accompaniment for champagne.

These biscuits were invented in the 1690s by bakers in Reims, who wanted to make something that could be made using the heat from their ovens between baking batches of bread. The shop, Maison Fossier, has been making Biscuit Roses de Reims since it opened in 1756 and now can be found throughout France and around the world. These biscuits were even served during the Coronation of Louis XVI at Reims, and Maison Fossier became the biscuit maker for the royal family.

You are supposed to serve these biscuits with champagne (preferably champagne from Reims), and they are made to be dipped into the champagne to bring out the subtle flavors of the cookies. Of course, you don't have to sell us on anything that involves champagne, so we bought a few tins as gifts and a bag for us to enjoy on our trip. Once we were home, we missed having these cute and crunchy biscuits and decided to make them ourselves. We found the original recipe on the official website for France, so we decided not to alter it much because if it is on the official website for France, it must be good.

xxx Ivy & Eve

Adapted from the recipe on France.fr.

Makes about 45 cookies.

Ingredients

  • 4 large eggs at room temperature (separate the yolks from the whites)

  • 1 tsp vanilla extract

  • 1 cup sugar

  • 1 1/2 cups flour

  • 1/3 cup cornstarch

  • 1 tsp baking powder

  • 6-8 drops of red food coloring (depending on how pink you want them)

  • Powdered (confectioner's) sugar for dusting the cookies

  • Pastry bag with a 1/4-inch smooth tip

Directions

  1. Preheat the oven to 275ยฐF. Mix the yolks, sugar, and vanilla in a bowl using a hand blender with a whisk attachment, on increasing speed over 5-6 minutes. Beat in 2 of the egg whites for another 2 minutes. Beat in the remaining 2 egg whites and the food coloring for an additional 5 minutes until the mixture begins to form stiff peaks.

  2. Sift the flour, cornstarch, and baking powder into the bowl, folding in gently with a spatula. You want a final result that is smooth and uniform in color. Scrape it into the pastry bag.

  3. Cover a baking sheet with parchment paper and spray with non-stick baking spray. Squeeze out strips of the mixture that are 1/4-inch wide (about as wide as your finger) and about 3 inches long and 1/4-1/2 inches apart. Sprinkle with powdered sugar and bake for 10-15 minutes, until a toothpick comes out clean. (You don't want the biscuits to start browning though, or else they won't be pink!) Take the biscuits out, sprinkle them with more powdered sugar, and place them back in the oven for another 10-15 minutes.

  4. When you take them out, quickly cut the biscuits' edges so that you have even rectangles. Do this before they cool, or else they become rather difficult to cut. If they cool before you finish, you can place them back in the oven for a few minutes to soften. If once they cool, they aren't completely crunchy, you can always but them back in the oven at 200ยฐF and dry them out for about 20 minutes.

  5. Serve with champagne, dip, and enjoy!

Our dog Pearl and cat Fatty Pants loved them too!

Our dog Pearl and cat Fatty Pants loved them too!

Raspberries Romanoff

Ever since we can remember, our Dad has been whipping up Raspberries Romanoff for dessert. We loved it when our Dad made this because it looked and sounded so fancy! Now that we are older, we are surprised how easy it is to make this delicious dessert!

xxx Ivy & Eve 

Serves two. 

Ingredients

  • 1/2 cup whipping cream

  • 1/2 cup (about 3 scoops) vanilla ice cream

  • 1 six-ounce carton of Raspberries

  • 1 tablespoon powdered sugar

  • 1 tablespoon Grand Marnier 

Directions

  1. Chill a mixing bowl in the freezer for at least 10 minutes. 

  2. Pour whipping cream into the chilled bowl and mix on high until it begins to thicken. 

  3. Add the sugar and mix till the cream starts creating peaks. 

  4. Gradually add the ice cream in small scoops. Mix until the ice cream is incorporated but still has chunks of ice cream (you want a bit of texture to your topping). 

  5. Finally, add the Grand Marnier and fold into the mixture. 

  6. Place half the raspberries into two serving glasses and the whipped topping on top. 

  7. Add a few raspberries and mint on top for garnish. 

  8. Enjoy!

TIP: If you like your dessert to have a bit more kick, add some more Grand Marnier! You can also mix it up and try it with strawberries, blueberries, or blackberries!